
Pruning
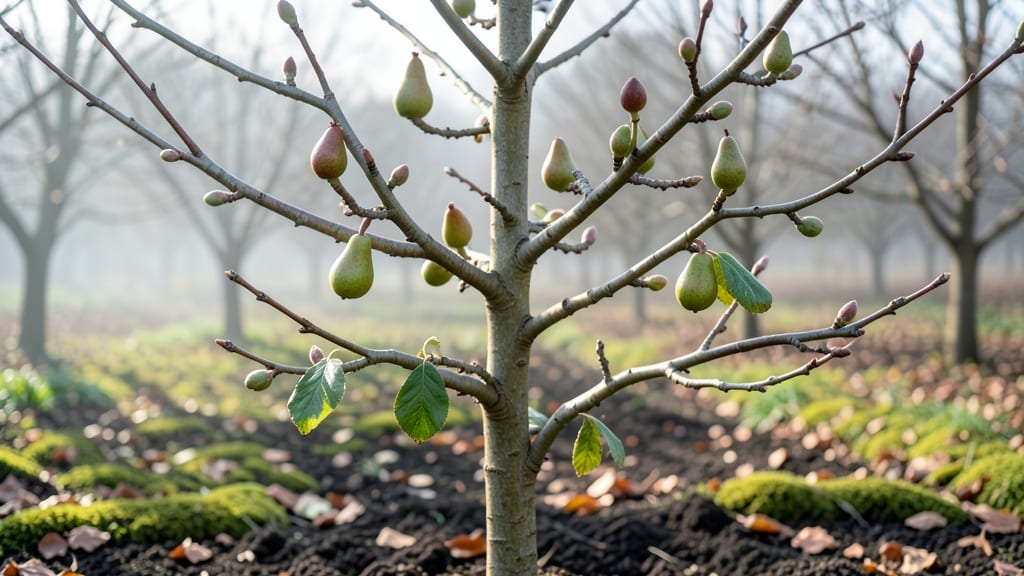
Winter pruning pear tree fruit buds sets the stage for a harvest so heavy your neighbors will ask for pears. 🌿 I’ve learned the hard way that skipping this step means smaller fruit, fewer blooms, and a tree that struggles to focus its energy where it counts—on producing those sweet, juicy fruits we all crave.
The secret lies in timing and technique: prune when the tree is dormant but before new growth starts, and always cut back to outward-facing buds. This isn’t about hacking branches—it’s about shaping the tree to maximize sunlight and airflow, which directly impacts how many fruit buds form.
A sharp pair of pruners and a clear day are all you need to get started.
By spring, you’ll see plump, swollen fruit buds along the branches—each one a promise of summer’s harvest. The buds that survive winter’s chill will burst into blossoms, and those blossoms turn into fruit.
It’s a slow process, but the payoff is worth it: trees pruned this way produce 30-50% more fruit than neglected ones.
Works for both dwarf and standard pear trees, and the same principles apply whether you’re growing Bartletts, Bosc, or Asian pears. Here’s how to do it right the first time—and avoid the mistakes that waste years of potential harvests.
📚 In This Guide
- What you need
- Instructions
- Tips and common mistakes
- Wrapping up and next steps
What you need
- ● Pruning shears: Bypass pruners (sharp, clean, and disease-free) for cuts up to ½ inch in diameter.
- ● Loppers: For thicker branches (½–2 inches in diameter). Look for ratcheting or bypass-style loppers with long handles for leverage.
- ● Pruning saw: A folding or curved-blade saw for branches thicker than 2 inches.
- ● Disinfectant: 70% isopropyl alcohol or a 10% bleach solution (1 part bleach to 9 parts water) to sterilize tools between cuts.
- ● Gloves: Heavy-duty, cut-resistant gloves (e.g., mechanics’ or pruning gloves) to protect hands from thorns and splinters.
- ● Rubbing alcohol or hand sanitizer: For cleaning hands before and after pruning.
- ● Pruning sealant: Tree wound paint (e.g., Tanglefoot Tree Wound Pruning Seal) to coat large cuts (controversial but some swear by it!).
- ● Ladder or step stool: For reaching higher branches safely. Ensure it’s stable and non-slip.
- ● Marking twine or flags: To tag branches for removal (helpful if you’re unsure about cuts).
- ● Disposable bags or bucket: For collecting pruned branches and debris.
- ● Safety glasses: To shield eyes from debris, especially when using a saw.
- ● Notebook & pen: To jot down notes on your tree’s structure or pruning plan.
- ● Timing: Prune during dormant season (late winter, before buds swell—typically January–February in most climates). Avoid pruning when the tree is stressed (e.g., drought, extreme cold).
- ● Weather: Choose a dry, calm day (no rain or wind) to prevent sap bleeding and ensure safety.
- ● Tree health: Inspect the tree for disease (e.g., fire blight) or pests before pruning. Treat issues first if needed.
- ● Safety first: Wear closed-toe shoes and avoid pruning near power lines.
How to prune pear trees in winter for stronger fruit buds
Winter’s the perfect time to shape your pear tree—here’s how to prune for next year’s harvest.
✂️ Step 1: Gather Tools and Safety Gear
Start with clean, sharp pruning shears for cuts under ½ inch in diameter, and a pruning saw for thicker branches. I always wear heavy gloves—pear tree branches can be surprisingly thorny, and the bark has a rough texture that grabs skin. Disinfect your tools with rubbing alcohol to prevent spreading disease between cuts.
Lay out a tarp or old blanket below the tree to catch fallen branches and debris. This makes cleanup easier and keeps your workspace tidy. I like to work on a dry, sunny winter day when the ground is frozen—this prevents mud from sticking to tools and makes cleanup simpler.
☀️ Step 2: Identify and Remove Dead or Diseased Wood
Scan the tree for branches that are completely brown, brittle, or missing bark. These are dead and must go—they drain energy from healthy growth. Cut back to the nearest healthy bud or branch collar (the swollen area where the branch meets the trunk). If you see signs of fungal disease like black spots or oozing sap, remove those branches immediately and dispose of them in a sealed bag.
Don’t worry about making perfect cuts here—just focus on removing anything that’s clearly unhealthy. You’ll see the contrast clearly: healthy wood is greenish inside when cut, while dead wood is hollow or dark brown. This step prevents disease from spreading to your fruit buds later.
✂️ Step 3: Thin the Canopy for Airflow and Light
Step back and look at the tree’s overall shape. Your goal is to create an open center with sunlight reaching all branches. Remove branches that cross or rub against each other—they’ll create wounds and invite disease. I aim to thin out about 20-25% of the smallest branches first, focusing on those growing inward or downward.
Cut just outside the branch collar at a slight angle to prevent water from pooling. You’ll notice the tree’s natural structure more clearly as you work—pear trees grow best when they have room to breathe. This step ensures your fruit buds get maximum sunlight for strong, sweet fruit next season.
🌱 Step 4: Shape for Future Growth and Fruit Production
Now focus on shaping the tree for balanced growth. Look for branches that are growing too vertically—these are called "water sprouts" and should be removed entirely. Cut them back to a lateral branch or bud that’s growing outward. For horizontal branches, aim to space them 6-12 inches apart along the main trunk.
Pay special attention to the lower branches—pear trees often grow better fruit on branches that receive partial sunlight. If you have space, leave some lower branches to encourage fruit production near the base. This step sets up your tree for a strong framework that supports heavy fruit loads.
⏰ Step 5: Clean Up and Monitor for New Growth
After pruning, rake up all fallen branches and debris from under the tree. This removes hiding spots for pests and reduces disease risk. I like to apply a thin layer of mulch around the base (but not touching the trunk) to protect the roots from winter temperature swings. Water the tree deeply if the ground isn’t frozen.
In early spring, you’ll see new growth emerge from the buds you left behind. This is your reward for careful pruning! Watch for any signs of stress like yellowing leaves or oozing sap—these could indicate over-pruning or disease. With proper care, your pear tree will reward you with a bountiful harvest next summer.
Tips & tricks for perfect winter pear tree pruning
Common mistakes can turn a good pruning session into a wasted winter day—here's how to avoid them.
Tool Prep is Non-Negotiable: I learned this the hard way after ruining three pruning sessions with dull tools. Always sharpen your pruning shears before starting—dull blades tear wood instead of making clean cuts, which slows healing and invites disease. For cuts over ½ inch, use your pruning saw at a 45-degree angle to reduce tear-out. This creates smoother cuts that heal faster, protecting your fruit buds from infection.
Visual Cues for Healthy Wood: When checking for dead branches in Step 2, look for these three key signs: hollow centers, dark brown color when cut, and lack of green pith. Healthy wood should snap with a clean break and reveal greenish inner layers. If you're unsure, make a small test cut—this prevents accidentally removing live branches that just look dry. Remember, dead wood is like a parasite on your tree, stealing nutrients from your future harvest.
Canopy Thinning Strategy: That 20-25% thinning recommendation in Step 3 isn't arbitrary—it's based on how pear trees naturally grow. Aim to remove branches that grow inward at angles less than 45 degrees from vertical. These branches compete for sunlight and crowd out your fruit-producing buds. Leave the branches that form a natural vase shape with outward-facing growth—this creates the ideal framework for fruit development while allowing air circulation to prevent fungal issues.
Water Sprout Identification: Vertical water sprouts are the sneaky villains of pear tree pruning. They're the fast-growing, thin branches shooting straight up from the trunk or larger branches. These energy hogs produce little fruit but steal resources from your productive branches. Cut them back to a lateral branch or bud growing outward—you'll know you've got the right ones when you see them immediately start growing back in spring from the buds you left behind.
Pro Tips for Pear Tree Fruit Buds
- Common mistakes can turn a good pruning session into a wasted winter day—here's how to avoid them.
- Tool Prep is Non-Negotiable: I learned this the hard way after ruining three pruning sessions with dull tools. Always...
- Visual Cues for Healthy Wood: When checking for dead branches in Step 2, look for these three key signs: hollow cente...
Frequently asked questions
Got questions about pear tree fruit buds and winter pruning? You’re not alone! Here are answers to the most common queries to help you prepare for a fruitful season ahead.
When is the best time to prune pear tree fruit buds?
Prune pear trees during their dormant season—typically late winter (January to early March) before buds swell but before new growth starts. This timing minimizes stress on the tree and promotes healthy spring regrowth. Avoid pruning in fall, as it can invite disease.
Can I prune pear trees in cold or freezing temperatures?
Yes, but with caution! Prune on mild winter days (above 40°F/4°C) to avoid damaging the wood. If temperatures drop suddenly, wait for a warmer stretch. Cold weather can make branches brittle, increasing the risk of splitting or tearing when pruned.
How do I identify fruit buds vs. vegetative buds on a pear tree?
Fruit buds are fatter, rounder, and often clustered near last year’s growth, while vegetative (leaf) buds are pointier and spaced farther apart. Fruit buds may also have a slight reddish or brownish tint in some varieties. Hold a bud between your fingers—fruit buds feel firmer!
What should I do if my pear tree has no fruit buds?
Lack of fruit buds could signal poor pollination, disease, or over-pruning. Check for fire blight or cankers on branches, and ensure you have at least two compatible pear varieties for cross-pollination. If the tree is young, be patient—it may take 3–5 years to bear fruit.
Can I prune fruit buds to shape the tree, or should I leave them alone?
You can lightly thin fruit buds (remove 10–20%) to improve air circulation and fruit size, but avoid heavy pruning. Focus on removing dead, diseased, or crossing branches first. Over-pruning buds can reduce next year’s harvest, so prioritize structural pruning over aggressive shaping.
Wrapping up and next steps
Winter is the perfect time to shape your pear tree’s future harvest—pruning fruit buds now ensures stronger branches, better airflow, and a bountiful summer crop! 🌱 By following the right techniques, you’re not just trimming; you’re investing in your tree’s health and productivity. Start small if you’re new, but don’t hesitate to roll up your sleeves and get hands-on—your future pear pies will thank you!
Ready to take action? Grab your pruners, dust off that ladder, and schedule your pruning session before buds swell in early spring. Your pear tree (and your taste buds!) will reward you with years of sweet, sun-ripened fruit. Happy pruning!