
Pruning
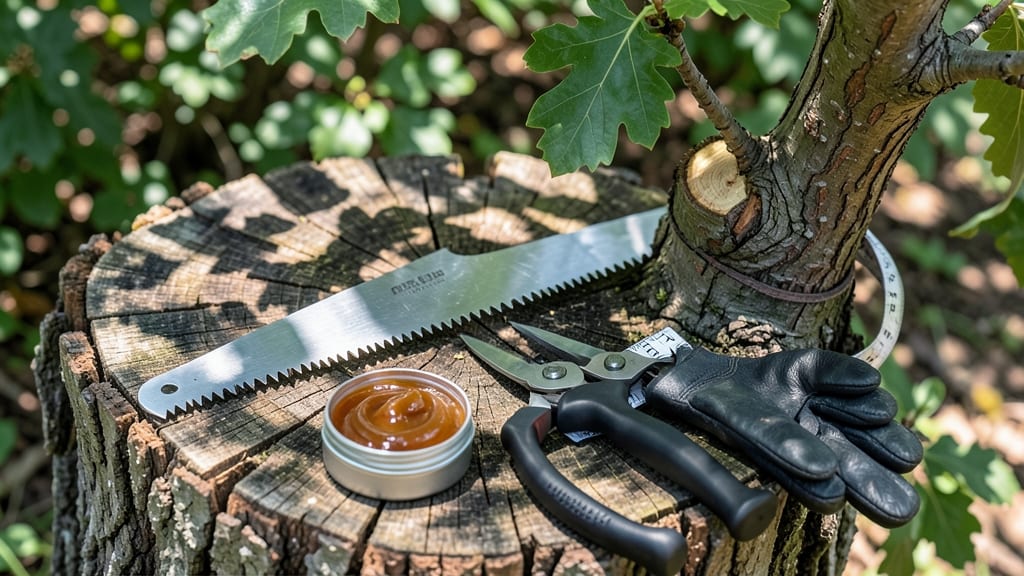
Cutting tree branches the wrong way can turn a simple pruning job into a messy, bark-damaging disaster. ✂️ I’ve ruined more branches than I’d like to admit—until I learned the three-cut method, which keeps trees healthy and your tools sharp.
The secret isn’t brute force; it’s precision, timing, and knowing where to make the first cut.
You’ll need bypass pruners for small branches (under ½ inch thick) and a pruning saw for anything thicker—no dull tools allowed. Work on a dry day when branches are light, and avoid cutting during winter stress or extreme heat.
The right technique prevents tears, splits, and disease entry points that turn a clean cut into a wound.
By the end, you’ll make cuts that heal faster, leaving a smooth collar where the branch meets the trunk. No more jagged stubs or bark strips—just clean lines that keep your tree thriving. Even large branches (3+ inches) become manageable with the right approach, and you’ll save hours of cleanup.
This method works for fruit trees, shade trees, and even shrubs—no matter your yard size. Let’s get those branches off safely, the first time.
📚 In This Guide
- What you need
- Instructions
- Tips and common mistakes
- Wrapping up and next steps
What you need
- ● Pruning shears or hand pruners – For small branches (up to ½ inch thick). Opt for bypass pruners (sharp, clean cuts) over anvil types.
- ● Loppers – For medium branches (½ to 1½ inches thick). Choose long-handled loppers (24–36 inches) for leverage and safety.
- ● Pruning saw – For branches thicker than 1½ inches. A curved-tooth saw (for green wood) or straight-tooth saw (for dry wood) works best.
- ● Chainsaw – For large branches (2+ inches) or heavy-duty pruning. Use a 14–18-inch bar for most residential trees.
- ● Work gloves – Heavy-duty, cut-resistant gloves (ANSI-rated) to protect hands from saw teeth and thorns.
- ● Safety glasses or goggles – Impact-resistant lenses to shield eyes from debris.
- ○ Hard hat (optional but recommended) – If working under dense canopy or near falling branches.
- ● Sturdy ladder or tree climbing gear – Only if branches are high up. Use a 3-point contact rule (hands + feet always on the ladder).
- ● First-aid kit – Include antiseptic wipes, bandages, and tweezers for minor cuts or splinters.
- ● Rope or branch grabber – To secure or pull down smaller branches after cutting.
- ● Tree wound dressing – Only use pruning sealant if the cut is large (over 2 inches); otherwise, let it heal naturally.
- ● Extension pole saw – For high branches without climbing (great for small to medium limbs).
- ● Ear protection – If using a chainsaw for extended periods (earplugs or muffs).
- ● Notebook & marker – To label cuts or track pruning progress (helpful for large trees).
- ● Buddy system – A second person to spot, hold branches, or call for help if needed.
Step-by-Step instructions for making precision cuts on tree branches
Here's the method I trust to remove branches cleanly without tearing bark or harming the tree.
✂️ Step 1: Assess the Branch and Plan Your Cuts
Start by examining the branch you're cutting. Look for the branch collar—that thick, swollen area where the branch meets the trunk or larger limb. This is your guide for where to make the cut. Never remove this collar, as it contains protective tissues that help the tree heal.
Use a pruning saw or loppers depending on the branch size—anything over 2 inches thick needs a saw. Mark your cutting line with a piece of tape or chalk about 1/4 inch outside the branch collar. This small buffer prevents tearing when you cut.
✂️ Step 2: Make the Top Cut First
Position yourself so you're cutting just outside the branch collar on the underside of the branch. Angle your saw or lopper slightly upward—this creates a flat surface that prevents water from pooling and rotting the wound. For branches over 3 inches thick, make a notch on the top side first to guide your final cut.
Apply steady pressure and cut slowly to avoid pinching or tearing. You'll hear a clean break when you hit the center of the branch. If the bark tears, you've cut too close—this exposes the tree to disease. Step back and check your work before moving to the next cut.
✂️ Step 3: Remove the Branch Stub
Now cut just outside the branch collar on the top side of the branch stub. This time, cut straight across—no angle needed here. The goal is to remove the remaining wood while leaving the collar intact. If the stub is large, you might need to make a small notch first to prevent tearing.
For stubborn branches, use a pruning saw with a curved blade—it glides better through tight spaces. Once the stub is gone, step back and admire your clean cut. The branch collar should still be visible, looking like a slight ridge around the wound. This tells you the tree is ready to heal properly.
🌿 Step 4: Clean Up and Protect the Tree
Remove any torn bark or loose wood from the cut area—these pieces can trap moisture and invite rot. If the wound is large (over 2 inches wide), consider applying wound dressing (like tree sealant) to protect it from pests and disease. For smaller wounds, let the tree seal itself naturally—it's stronger that way.
Water the tree deeply after pruning, especially if it's been dry. This helps the tree recover faster. Avoid heavy pruning in late summer or fall, as new growth won't have time to harden off before winter. The best time to prune most trees is late winter or early spring, when the tree is dormant but about to wake up.
⏰ Step 5: Monitor Healing and Future Growth
Check the pruned area in 4-6 weeks to see how the tree is healing. You should see new growth around the branch collar as the tree seals the wound. If you notice oozing sap, dark streaks, or mushrooms growing from the cut, the tree may be infected—consult a local arborist for advice.
Pruning encourages stronger growth, so focus on removing dead, diseased, or crossing branches first. These cuts improve air circulation and sunlight penetration, which keeps your tree healthy for years. With each clean cut, you're not just shaping the tree—you're helping it thrive.
Tips & tricks for perfect tree branch cuts
These simple techniques will help you make clean, professional cuts that keep your tree healthy and thriving.
Tool Selection: For branches under 2 inches thick, loppers give you better control than pruning saws. The curved blade on loppers follows the natural contour of the branch, reducing the risk of tearing bark. For branches over 3 inches, a pruning saw with a fine-toothed blade is essential—coarse teeth can shred wood fibers and damage the tree.
The Notch Technique: When cutting branches over 3 inches thick in Step 2, make that initial notch on the top side with your saw. Angle it slightly downward toward the branch collar. This creates a guide for your final cut and prevents the branch from tearing away from the trunk. I've seen too many clean cuts ruined because someone skipped this step—don't make that mistake!
Visual Cues for Clean Cuts: In Step 2, when you're making the underside cut, look for the branch's natural taper. Your cut should follow this angle naturally. If you're forcing the tool downward, you're cutting too close to the trunk. The goal is to create a smooth, sloping surface that sheds water—this prevents rot. After cutting, the branch should break cleanly from the trunk without any bark ripping.
Seasonal Timing: The instructions mention late winter or early spring as ideal, but there's more to it. In Step 4, after pruning, avoid heavy cuts when new growth is already visible—this stresses the tree. The best time is actually when the tree is fully dormant but just before buds swell. This timing gives the tree maximum energy to heal before the growing season begins.
Pro Tips for Best Way To Cut A Tree Branch
- These simple techniques will help you make clean, professional cuts that keep your tree healthy and thriving.
- Tool Selection: For branches under 2 inches thick, loppers give you better control than pruning saws. The curved blad...
- The Notch Technique: When cutting branches over 3 inches thick in Step 2, make that initial notch on the top side wit...
Frequently asked questions
Got questions about cutting tree branches safely and effectively? You’re not alone! Here are answers to the most common concerns—from timing to tools and troubleshooting.
What’s the best time of year to trim tree branches?
The ideal time depends on your tree type. For most deciduous trees, late winter or early spring (before new growth) is best. Evergreens can be pruned anytime, but avoid heavy cuts in late summer to prevent winter dieback. Pro tip: Avoid trimming during extreme heat or drought.
Can I use regular scissors or loppers for thick branches?
No! Thick branches (over 2 inches in diameter) need a pruning saw or pruning shears. Scissors or small loppers will dull quickly and leave jagged cuts. For branches thicker than 6 inches, a chainsaw (with proper safety gear) is safest. Always match your tool to the job!
How do I prevent damaging the tree bark when cutting?
Make clean cuts by avoiding tearing or crushing the branch. Use a sharp saw or shears and cut just outside the branch collar (the swollen area where the branch meets the trunk). Never leave stubs—this invites disease. Bonus: Wrap larger cuts with pruning sealant if your tree is prone to bleeding sap.
What should I do if a branch falls and damages my property?
First, assess the damage and take photos for insurance claims. Remove the branch safely (or call a professional if it’s large). If the tree is dead or hazardous, consult an arborist to avoid liability. Remember: Always check local regulations—some areas require permits for large removals.
Are there alternatives to cutting branches myself?
For large or high branches, hire a certified arborist (look for ISA-certified professionals). Many tree services offer emergency pruning for storm-damaged branches. If you’re unsure, ask a neighbor with experience—safety first!
| Quick Troubleshooting | Solution |
|---|---|
| Branch won’t budge—tool keeps slipping | Use a rope or pulley system or call a pro for heavy branches. |
| Cut looks ragged or torn | Sharpen your blade or switch to a pruning saw for cleaner cuts. |
| Sap is oozing excessively | Apply pruning sealant to larger wounds to prevent pests/disease. |
Wrapping up and next steps
Cutting tree branches the right way keeps your yard safe, healthy, and beautiful—without harming the tree! Remember to use the three-cut method, wear protective gear, and sharpen your tools for clean, precise cuts. Whether you’re pruning for safety, aesthetics, or growth, patience and technique make all the difference.
Now that you’re ready, grab your tools and give it a try! Start small with a single branch to build confidence, and soon you’ll be a pruning pro. Happy trimming! 🌳✂️