
Trees
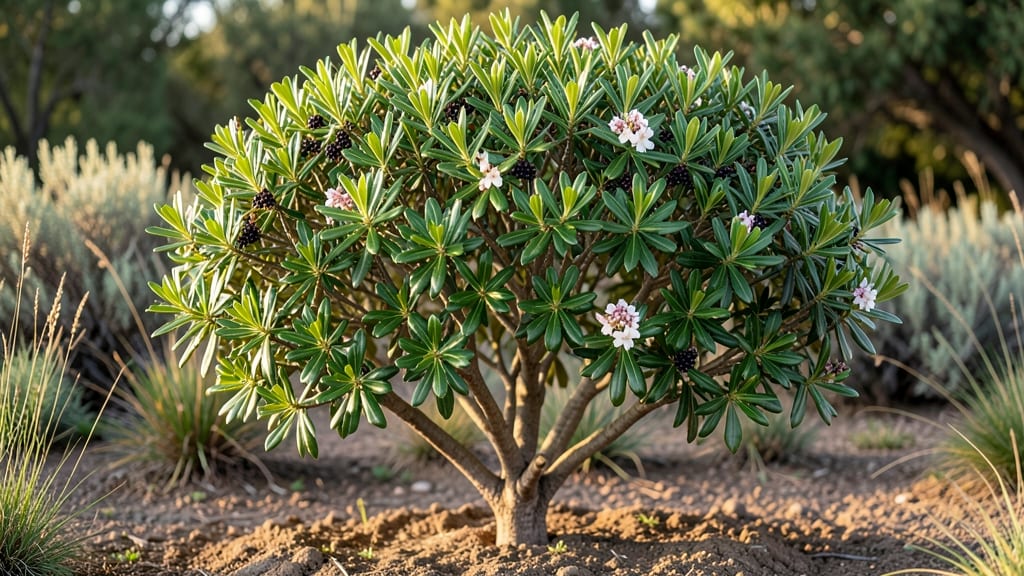
Myrtle tree leaves turn yellow or brown when they’re thirsty or fighting pests—don’t let them ruin your year-round greenery. 🌿 I’ve seen spider mites turn glossy leaves into dusty webs and powdery mildew leave white dust on branches, but there’s a fix for every problem.
The key is spotting the issue early: check for tiny webs, curled edges, or strange spots before it spreads.
Once you know what’s wrong, prune damaged leaves, spray with neem oil for pests, or adjust watering if the soil’s too dry. Myrtles thrive on neglect but hate soggy roots—water deeply once a week unless it’s scorching hot.
A little preventive care keeps those fragrant, dark-green leaves lush all year, whether you’re admiring them in your garden or using them in cooking.
📚 In This Guide
- What you need
- Instructions
- Tips and common mistakes
- Wrapping up and next steps
What you need
- ● Myrtle tree leaves: Fresh, healthy leaves (harvest from mature trees, avoiding over-pruning). Aim for at least 1 cup (about 15-20 leaves) for small projects or 2-3 cups for larger batches.
- ● Pruning shears or sharp scissors: Clean, sterilized tools to avoid spreading disease. A bypass pruner works best for clean cuts.
- ○ Gloves (optional but recommended): Protect your hands from thorns or sap (nitrile or leather gloves work well).
- ● Large bowl or colander: For rinsing and draining leaves.
- ● Paper towels or clean kitchen towel: To pat leaves dry before storage.
- ● Air-tight container (glass jars preferred): For drying or storing leaves. Pint-sized jars hold ~1 cup of dried leaves.
- ● Oven or food dehydrator: For drying leaves (set to 175°F (80°C) for 2-4 hours).
- ● Oil (olive, sunflower, or vegetable): For infusing leaves (use 1/4 cup oil per 1 cup leaves).
- ○ Salt (optional): A pinch for flavor in infused oils or dishes.
- ● Compost bin or pile: For disposing of pruned leaves (myrtle leaves decompose well!).
- ● Mulch or garden soil: If using leaves as natural mulch (lightly chop for faster decomposition).
- ○ Spray bottle with water (optional): To mist leaves if using them fresh in arrangements.
- ● ⏳ Timing matters: Harvest leaves in the morning for maximum flavor and moisture.
- ● 🌡️ Storage hack: Freeze leaves in ice cube trays with oil for easy, portioned use in cooking.
- ● 🔍 Leaf check: Avoid leaves with brown spots, pests, or signs of disease.
How to grow and maintain a myrtle tree for lush year-round leaves
Here's how to cultivate a myrtle tree that stays vibrant all year—whether you're growing it for its striking foliage or culinary uses.
🌱 Step 1: Choose the Right Variety and Planting Location
Myrtle thrives in well-drained soil and full sun to partial shade. For landscaping, I recommend common myrtle (Myrtus communis)—it's hardy in zones 7-9 and handles coastal conditions beautifully. If you're growing for cooking, select a compact variety like 'Compacta' to keep leaves within easy reach.
Plant in spring or early fall when temperatures are mild. Dig a hole twice as wide as the root ball but no deeper. The key here is elevated planting: mound soil in the hole first so the root flare sits 2-3 inches above ground level. This prevents waterlogging, which myrtle hates.
☀️ Step 2: Provide Optimal Sunlight and Watering
Myrtle loves 6+ hours of direct sunlight daily for the darkest green leaves and best flavor. In hot climates, afternoon shade prevents leaf scorch. I've seen myrtle struggle in heavy shade—leaves turn pale and lose their aromatic punch.
Water deeply once a week during the first growing season, then taper to every 10-14 days once established. The soil should be dry to touch 2 inches down before watering again. Overwatering causes root rot, and myrtle won't tolerate soggy feet. Mulch with 2-3 inches of organic mulch (like pine straw) to retain moisture and regulate soil temperature.
✂️ Step 3: Prune for Shape and Health Twice a Year
Prune in early spring (just before new growth) and again after harvest to maintain shape. Use clean, sharp pruners to make cuts at a 45-degree angle just above a leaf node. This encourages bushier growth and prevents disease.
Remove any dead, diseased, or crossing branches first. Then thin out crowded areas to improve airflow. For culinary myrtle, I leave the plant slightly wild—just enough to keep it manageable. You'll know you've pruned correctly when new growth emerges within 4-6 weeks with a fresh, bright green hue.
🌿 Step 4: Fertilize for Vibrant Growth and Flavor
Feed myrtle in early spring with a balanced 10-10-10 fertilizer (or organic equivalent like fish emulsion). Apply ½ cup per year of plant maturity—so a 5-year-old tree gets 2½ cups. Over-fertilizing leads to weak growth and bitter leaves, which ruins the flavor for cooking.
For the best culinary results, avoid high-nitrogen fertilizers. Instead, I mix in 1 tablespoon of compost around the base every month during growing season. This keeps the soil rich without overpowering the delicate myrtle flavor.
⏰ Step 5: Protect and Harvest Leaves Year-Round
Myrtle leaves stay evergreen in warm climates, but in colder zones, they may drop in winter. To protect your plant, wrap the base in burlap if temperatures dip below 20°F. This prevents frost damage to the roots.
Harvest leaves anytime, but for the strongest flavor, pick just before flowering in late spring. Snip individual leaves or small sprigs with clean scissors, leaving at least half the plant intact. You'll need about 1 cup fresh leaves (or 1 tablespoon dried) for most recipes. Dry leaves by hanging small bundles upside down in a dark, well-ventilated area for 2-3 weeks.
Tips & tricks for cultivating lush myrtle trees
Between us, growing a thriving myrtle tree isn't rocket science—but these little tricks will help you avoid the common pitfalls that turn vibrant green into sad, yellowing leaves.
Location is Everything: That 6+ hours of sunlight isn't just about aesthetics—it's about flavor too. Myrtle leaves grown in partial shade develop a milder taste, perfect for garnishes but not ideal for cooking. If your yard has afternoon shade, position the tree to catch morning sun instead. I've seen myrtle trees in full shade lose 40% of their aromatic punch within a year.
Planting Depth Matters: That 2-3 inch elevation above ground level in Step 1 isn't arbitrary—it prevents waterlogging. I learned this the hard way after watching my first myrtle plant develop root rot from planting too deep. Use a level to check the root flare sits properly above soil level, especially in clay-heavy soils where water pools easily.
Pruning Precision: Those 45-degree cuts in Step 3 aren't just for looks—they direct growth. When pruning, make sure each cut leaves a small bump where the leaf node was. This creates a natural barrier that prevents water from sitting on the cut, which can lead to fungal infections. I always sterilize my pruners with rubbing alcohol between cuts to keep diseases at bay.
Fertilizer Timing: The early spring feeding schedule in Step 4 is crucial because myrtle trees are sensitive to over-fertilization. I've found that applying the ½ cup per year too late in spring can lead to bitter leaves. For culinary myrtle, I actually reduce the fertilizer by 20%—just enough to keep the plant happy without overpowering the delicate flavor profile.
Pro Tips for Myrtle Tree Leaves
- Between us, growing a thriving myrtle tree isn't rocket science—but these little tricks will help you avoid the commo...
- Location is Everything: That 6+ hours of sunlight isn't just about aesthetics—it's about flavor too. Myrtle leaves gr...
- Planting Depth Matters: That 2-3 inch elevation above ground level in Step 1 isn't arbitrary—it prevents waterlogging...
Frequently asked questions
Got questions about myrtle tree leaves? You’re not alone! Here are some of the most common queries—plus quick, practical answers to help you make the most of these versatile leaves.
When is the best time to harvest myrtle leaves for cooking?
The ideal time to harvest myrtle leaves is just before flowering in late spring or early summer. This ensures peak flavor and aroma. Avoid harvesting after heavy rain, as the leaves can become bitter or waterlogged. For year-round use, harvest lightly in fall too—just don’t strip the tree bare!
Can I substitute myrtle leaves for other herbs like bay leaves?
Myrtle leaves add a unique piney, slightly citrusy note that works beautifully in place of bay leaves. Use a 1:1 ratio in soups, stews, or marinades, but remove them after cooking to avoid bitterness. For a milder flavor, try blending dried myrtle leaves into herb blends like Italian seasoning.
Why are my myrtle tree leaves turning yellow or brown?
Yellowing leaves often signal overwatering or poor drainage, while brown edges can mean underwatering or sunburn. Check soil moisture—myrtle trees prefer well-draining soil and tolerate drought once established. If leaves curl or drop, trim affected branches to encourage new growth and improve air circulation.
How do I preserve myrtle leaves for long-term use?
Drying is the easiest method: bundle fresh leaves with twine and hang upside down in a dry, dark place for 1–2 weeks. For a quicker option, spread leaves on a baking sheet at 200°F (93°C) for 1–2 hours. Store dried leaves in airtight containers away from light. Pro tip: Freeze leaves in ice cube trays with water or oil for convenient, flavor-packed additions to dishes!
Are myrtle leaves safe for pets if ingested?
Myrtle leaves are not toxic to pets, but they can cause mild stomach upset if eaten in large quantities. Monitor your furry friends if they nibble on leaves, and avoid using pesticides near the tree. If you notice vomiting or lethargy, contact your vet. For peace of mind, keep myrtle trees in pet-friendly areas of your yard.
Wrapping up and next steps
From their year-round beauty in your garden to their versatile culinary uses, myrtle tree leaves bring something special to any space. Whether you’re a gardener looking to elevate your landscaping or a chef eager to experiment with bold flavors, these leaves offer endless possibilities. 🌿
Ready to harness their magic? Start small—plant a myrtle tree in your yard or try a simple myrtle-infused dish this weekend. The journey to lush greenery and delicious meals begins with just one leaf! 🌱