
Pruning
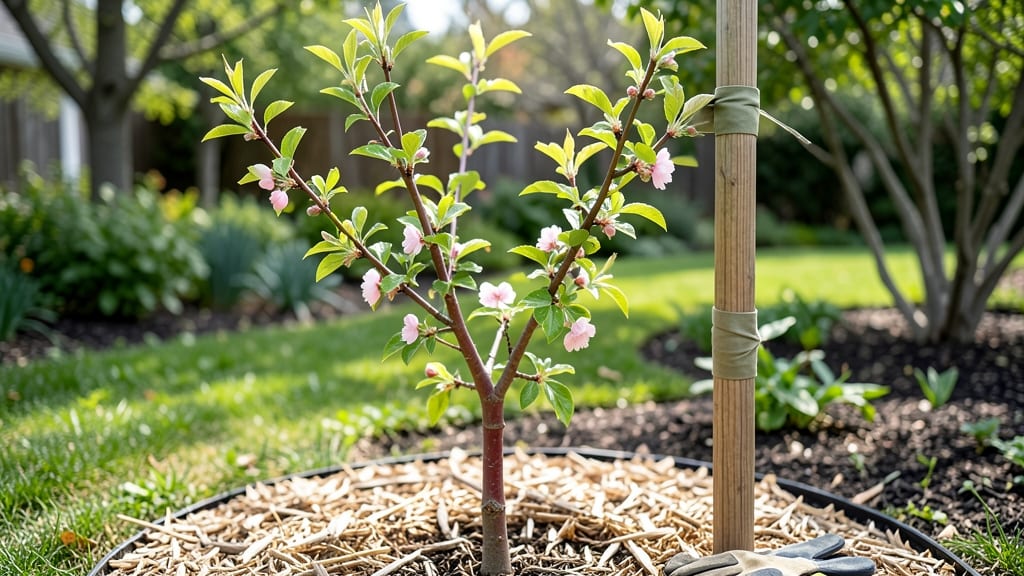
Staking a tree without damaging it starts with the right approach—gentle support that strengthens, not smothers. ✨ I’ve ruined more saplings than I’d like to admit by over-tightening or using rigid stakes, but this method works every time.
The key is flexibility: letting the tree sway slightly while giving it just enough structure to stand tall.
You’ll need a 4-6 foot stake (thicker than a pencil but thinner than your wrist), soft tree ties (wide fabric or rubber), and a mallet for gentle driving. Avoid metal stakes—they can girdle the trunk as the tree grows.
Position the stake on the windward side (where the tree leans) and bury it one-third of its length into the soil.
When securing the tree, wrap the tie loosely—you should be able to fit two fingers between the trunk and the stake. Check it every 4-6 weeks and loosen as the tree thickens. The goal is temporary support: most trees can stand alone within 1-2 years if staked correctly.
Skip the stake altogether for fast-growing, sturdy trees like willows or poplars—they’ll handle wind just fine. For delicate varieties (think fruit trees or young maples), this method keeps them upright without the long-term damage of rigid supports.
📚 In This Guide
- What you need
- Instructions
- Tips and common mistakes
- Wrapping up and next steps
What you need
- ● Tree stakes: 2–4 wooden or metal stakes (2–3 inches in diameter, 4–6 feet tall). Pro tip: Use untreated wood to avoid chemical damage!
- ● Tree tie or soft garden tie: 1–2 biodegradable or fabric ties (3–4 feet long). Never use wire—it can girdle the trunk!
- ● Shovel or post-hole digger: For digging holes to secure stakes.
- ● Measuring tape or ruler: To ensure proper stake placement (about 1/3 of the tree’s height from the base).
- ● Gloves: Heavy-duty work gloves to protect your hands from splinters or rough bark.
- ● Tree collar protector: A soft wrap around the trunk where the tie meets the bark to prevent rubbing.
- ● Mulch: Organic mulch (like wood chips) to protect the tree’s roots and retain moisture.
- ● Stake spreader: A metal or wooden bar to space stakes evenly for multi-stake setups.
- ● Watering can or hose: To hydrate the tree post-staking (especially in dry conditions).
Step-by-Step instructions for staking a tree without damaging it
Here's how to provide support while ensuring your tree develops strong, resilient growth.
🪴 Step 1: Choose the Right Stakes and Tie Materials
Select 3-4 flexible stakes (about 1/2 inch in diameter) for each tree, positioned 12-18 inches from the trunk in a balanced arrangement. I avoid rigid metal stakes—they can cut into bark as the tree sways. Instead, I use softwood stakes like willow or bamboo, which bend slightly when pressure is applied. For ties, choose wide, woven fabric strips (about 1-2 inches wide) or rubber tree ties. These distribute pressure evenly and won't dig into the trunk as the tree grows.
Position stakes at a 45-degree angle, burying 1/3 of their length into the soil. This creates a stable base that won't topple in wind. The top of the stakes should extend about 2 feet above the tree's current height—this ensures they can support the tree as it grows. I always test the angle by gently pushing the stake into the ground; if it resists, it's too steep and will pull away from the soil.
✂️ Step 2: Attach Stakes with Gentle, Adjustable Ties
Loop the first tie around the trunk and a stake, leaving a 2-3 inch gap between the tie and the bark. This space prevents rubbing and allows the trunk to thicken naturally. I like to use a simple crisscross pattern for fabric ties—cross the ends over the trunk and stake, then tuck them under themselves to secure. For rubber ties, I stretch them just enough to hold the tree upright without constricting growth. The key is minimal tension; you should be able to slide a finger between the tie and the bark.
Attach a second tie about 6-12 inches higher on the trunk, repeating the same loose, adjustable technique. This prevents the tree from leaning against a single stake. I always check the ties after a few days—they should feel snug but not tight. If the tree starts to lean, adjust the ties gradually over time rather than tightening them abruptly, which can restrict growth.
🌱 Step 3: Monitor and Adjust as the Tree Grows
After 4-6 weeks, check the ties for signs of constriction—look for indentations in the bark or the tree leaning against the stakes. If you see either, loosen the ties immediately. I like to use a small screwdriver to gently pry apart fabric ties if they've tightened over time. The goal is to let the tree move slightly in the wind; this strengthens its trunk. Remove one stake and its corresponding ties every 3-4 months to encourage the tree to stand independently. By the second year, most trees no longer need staking at all.
Watch for root flare exposure—if stakes are buried too deeply near the trunk, they can suffocate the roots. The top of the root ball should be visible above the soil line. If you notice the tree's lower branches rubbing against the stakes, trim them back slightly to prevent damage. I also avoid staking in high-wind areas unless absolutely necessary; excessive movement can stress the tree more than a little swaying.
⏰ Step 4: Remove Stakes at the Right Time
Start weaning the tree from stakes in late spring of the second year, when new growth appears. Remove one stake at a time, leaving the others in place for another 2-4 weeks to allow the tree to adjust. I always remove stakes on a calm day to minimize stress. By the end of the second growing season, the tree should be stable enough to stand on its own. If it leans slightly, that's normal—trees often grow toward the sun, and a small tilt is better than a rigid, unnatural posture.
After removing the last stake, leave the ties in place for another 1-2 weeks in case the tree needs occasional support. Then, carefully cut or unravel them to avoid damaging the bark. I use sharp pruning shears for fabric ties and gently peel off rubber ties. The tree will thank you with stronger, more resilient growth—no crisscrossed scars or weakened trunks from improper staking.
Tips & tricks for staking a tree without damaging it
These subtle adjustments make all the difference between a tree that thrives and one that struggles under support.
Stake Placement Precision: When positioning your 3-4 flexible stakes at a 45-degree angle, aim for equal spacing around the trunk—think of a compass pointing north, south, east, and west. This balanced arrangement prevents uneven pressure that can cause the tree to lean or develop weak spots. I've seen trees with stakes clustered on one side grow with permanent bends, so take the extra minute to arrange them symmetrically. The 12-18 inch distance from the trunk also matters: any closer and you risk restricting root growth; any farther and the stakes won't provide adequate support.
Tie Tension Technique: That 2-3 inch gap between the tie and bark in Step 2 isn't just a suggestion—it's crucial for healthy growth. I've learned this the hard way after seeing trees develop permanent indentations from ties that were too tight. Use the "finger test": if you can't slide your finger between the tie and trunk, it's too snug. For fabric ties, I find that crossing the ends over the trunk and tucking them under creates just enough tension without constricting. Rubber ties should stretch like a gentle hug, not a vice.
Seasonal Timing Strategy: The 4-6 week monitoring period in Step 3 works best when you start in early spring, just as new growth begins. This gives you time to adjust ties before summer winds test the tree's stability. I've noticed that trees staked in late spring often show signs of stress by summer—delayed staking means the tree hasn't had time to strengthen its root system before facing wind challenges. Also, the 3-4 month stake removal schedule assumes normal growing conditions; in areas with heavy winds or poor soil, you might extend this by 1-2 months.
Root Flare Rescue: When burying stakes, remember that 1/3 of their length should go into the soil—but never bury stakes deeper than 2 inches near the trunk. I've seen many gardeners accidentally suffocate the root flare (that swollen area at the tree's base) by burying stakes too deeply. The root flare should always remain visible above the soil line. If you notice soil mounding up around the base during stake installation, gently rake it away to maintain proper exposure. This small detail prevents one of the most common staking mistakes that stunts tree growth.
Pro Tips for Stake A Tree Without Damaging It
- These subtle adjustments make all the difference between a tree that thrives and one that struggles under support.
- Stake Placement Precision: When positioning your 3-4 flexible stakes at a 45-degree angle, aim for equal spacing arou...
- Tie Tension Technique: That 2-3 inch gap between the tie and bark in Step 2 isn't just a suggestion—it's crucial for ...
Frequently asked questions
Got questions about staking trees the right way? You’re not alone—proper support can feel tricky! Here are answers to the most common concerns, so you can give your tree the best care without stressing over mistakes.
When is the best time to stake a young tree?
Stake your tree immediately after planting to prevent wind rock, but avoid staking in winter unless heavy snow or ice is expected. For most trees, late spring or early summer (after root establishment) is ideal. If you’re unsure, check your local climate—trees in windy areas may need earlier support.
How tight should the stakes and ties be?
Loose is better! The stakes should be snug enough to stabilize the tree but not restrict movement. Use soft ties (like tree straps or old T-shirts) and adjust them so you can fit two fingers between the tie and the trunk. Recheck ties every 4–6 weeks—they’ll loosen as the tree grows.
What if my tree is already leaning? Can I still stake it?
Yes, but act fast! Gently straighten the trunk (if possible) and stake it within 1–2 weeks of planting. For older trees, staking may not fully correct the lean, but it’ll prevent further damage. If the lean is severe, consult an arborist—they can assess if bracing or pruning is needed.
Are there alternatives to traditional stakes and ties?
Try these gentle options:
- Bamboo or willow stakes: Flexible and less damaging than metal.
- Tree guards or spiral wraps: Protect the trunk while allowing natural movement.
- Living stakes: Plant fast-growing willow or dogwood cuttings near the tree for natural support.
- No stakes at all!: Some trees (like oaks or maples) root deeply and don’t need support.
How do I know if my tree is staked too tightly or for too long?
Watch for these red flags:
- Trunk girdling (a groove from the tie digging in).
- Stunted growth or yellowing leaves (signs of restricted root development).
- Trunk leaning away from the stake (the tree is fighting the support).
Wrapping up and next steps
Staking a tree the right way ensures strong, healthy growth without unnecessary stress to the plant. By choosing the right materials, using gentle techniques, and monitoring progress, you can provide the support your young tree needs—without causing long-term damage. 🌱
Now that you’re equipped with the knowledge, grab your tools and give your tree the care it deserves! Next up: Keep an eye on your tree’s progress and adjust stakes as it grows—because every little effort helps it thrive for years to come.