
Planting
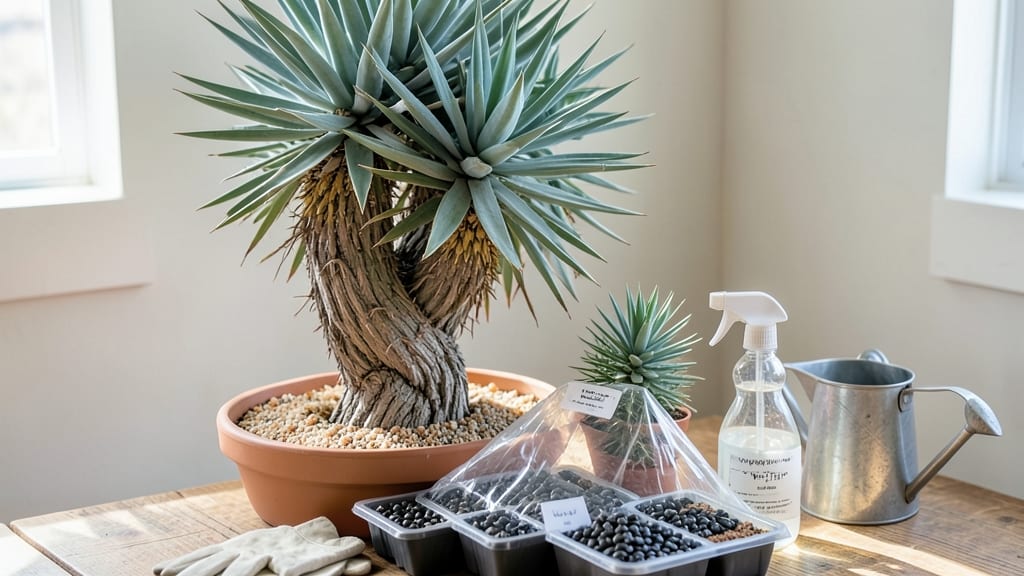
Planting Joshua tree seeds feels like betting on the desert's slowest race—it takes patience, but the payoff is worth it. 🌵 These iconic Southwest plants refuse to rush, often taking months to germinate, but with the right cold-stratification trick, you can coax them into sprouting in just 8 weeks instead of years.
The secret lies in mimicking their natural winter dormancy period, where freezing temperatures break their stubborn dormancy.
You'll need a few simple supplies: a plastic bag, some damp paper towels, and a freezer for the cold treatment. No fancy equipment—just what you'd find in most kitchens.
The process starts with scarifying the seeds (a fancy term for lightly nicking the hard outer shell) to help water penetrate, then packing them between damp towels in a sealed bag for 4-6 weeks in the freezer. It's like giving them a desert winter in miniature.
Once they've had their cold snap, you'll transfer them to well-draining soil—think cactus mix with extra perlite—and plant them just 1/4 inch deep. The key is consistency: keep the soil barely moist (not soggy) and place them in bright, indirect light.
Germination might still take a few weeks, but you'll start seeing those first tiny, grass-like shoots pushing through, a sign you've cracked the code on this notoriously difficult seed.
This method works best for gardeners in arid climates, but even humid regions can try it with adjusted watering. The biggest challenge? Waiting. Joshua trees don't play by typical plant rules—they test your patience, but when those first shoots appear, it feels like winning a slow-motion victory.
Ready to give it a try?
📚 In This Guide
- What you need
- Instructions
- Tips and common mistakes
- Wrapping up and next steps
What you need
- ● Joshua Tree seeds: 10–20 fresh, viable seeds (harvested or store-bought; avoid wild-collected seeds unless permitted).
- ● Cold-stratification supplies: 1 small plastic bag or container (resealable, 4–6 oz capacity).
- ● Potting mix or sphagnum peat moss (moistened, not soggy; ~1 cup).
- ● Ziploc bag or airtight container (for humidity during stratification).
- ● Germination setup: 2–3 small pots (3–4 inches in diameter) with well-draining cactus/succulent mix.
- ● Spray bottle (for gentle watering).
- ● Clear plastic wrap or humidity dome (to retain moisture).
- ● Growing environment: South-facing window or grow lights (12–14 hours/day).
- ○ Thermometer/hygrometer (optional but helpful for tracking temps: 60–75°F (15–24°C)).
- ● Seed-starting trays with drainage holes (for larger batches).
- ● Bottom heat mat (70–80°F) to speed up germination.
- ● Fungicide (like hydrogen peroxide (3%)) to prevent mold.
- ● Garden labels + marker (to track seed varieties).
- ● Patience… and a notebook to log progress! 📖
Step-by-step instructions for cold-stratifying Joshua tree seeds
Here’s how I’ve learned to break the dormancy cycle and coax these desert giants from seed.
🌱 Step 1: Harvest and Prepare the Seeds
Collect ripe Joshua tree seeds from healthy fruit pods—wait until they’re fully brown and dry, then crack them open to release the 1-inch-long seeds inside. I like to soak them overnight in lukewarm water to soften the tough outer shell, which speeds up the cold stratification process. This step is critical because the seed coat is naturally resistant to moisture, and pre-soaking helps it absorb water during stratification.
After soaking, spread the seeds on a paper towel in a single layer and let them air-dry for 24 hours. This prevents mold from forming when you later place them in the fridge. I keep them in a cool, dry spot while I prepare the stratification mix—this ensures they’re ready to go when the timing aligns.
💧 Step 2: Create the Stratification Mix and Moisten
Use a blend of 50% perlite and 50% peat moss for your stratification medium—this balance ensures proper drainage while retaining enough moisture. Fill a shallow container (like a plastic takeout box) with the mix, leaving 1 inch of space at the top. Moisten the mix until it feels like a wrung-out sponge: damp but not dripping.
Here’s the thing—I’ve found that over-moistening leads to mold, while too little moisture stalls germination. To test, squeeze a handful: water should bead up slightly but not run through your fingers. Once the mix is prepped, arrange the seeds 1 inch apart on the surface, pressing them lightly into the top layer of the mix.
⏰ Step 3: Stratify in the Fridge for 6-8 Weeks
Cover the container with a clear plastic lid or wrap it tightly in plastic wrap to create a humid environment. Place it in your fridge’s crispier drawer (around 35-40°F) for 6-8 weeks. This cold period mimics the natural winter cycle Joshua trees experience in the desert, breaking their dormancy. I check on them every 2 weeks to ensure the mix stays moist—just mist lightly if it feels dry to the touch.
Patience is key here. You won’t see any action for weeks, but that’s normal. The seeds are hard at work preparing to sprout. If you notice any mold (fuzzy spots), remove the seeds immediately and restart with fresh mix—mold can kill seeds before they even germinate.
☀️ Step 4: Move to Warmth and Light for Germination
After 6-8 weeks, transfer the container to a warm spot (around 70-75°F) with bright, indirect light. I use a seedling heat mat underneath to maintain consistent warmth, which triggers germination. Within 1-3 weeks, you’ll see tiny green sprouts pushing through the soil—this is your reward for the waiting game!
Once sprouts appear, remove the plastic cover to prevent damping-off (a fungal disease that attacks young seedlings). Keep the mix moist but not soggy, and place the container under a grow light (12-14 hours daily) to ensure strong, healthy growth. Joshua trees are slow starters, so don’t rush—give them time to develop their first true leaves before transplanting.
🪴 Step 5: Transplant Seedlings into Individual Pots
When seedlings reach 2-3 inches tall (usually after 8-12 weeks total), carefully transplant them into 4-inch pots filled with a cactus/succulent mix. Joshua trees hate wet roots, so use a mix designed for desert plants—it drains fast and mimics their natural habitat. Water lightly after transplanting, then let the soil dry completely before watering again.
Place the pots in a sunny window or under grow lights for 14+ hours daily. These seedlings are delicate at first, so avoid strong winds or drafts. Over the next few months, they’ll grow slowly but steadily—just like their namesake, they’re built for endurance. With time, they’ll develop the iconic rosette shape and eventually thrive in arid conditions.
Tips & tricks for perfect Joshua tree seed sprouting
These little-known tricks will help you avoid common pitfalls and maximize your success rate with these desert survivors.
Seed Selection: Always choose seeds from fully mature, brown pods—they should crack open easily when dry. If you can't find ripe pods, you can still use seeds from green pods, but they'll need an extra 24 hours of soaking to compensate for their tougher shells. I've found that seeds from the center of the pod tend to germinate faster than those from the edges.
Stratification Container Choice: While plastic takeout boxes work perfectly, you can also use small seedling trays with drainage holes. The key is shallow depth—never more than 2 inches of mix—so the seeds stay close to the surface where they can easily access moisture. I've used everything from repurposed yogurt containers to ceramic seedling dishes, as long as they're clean and have good airflow.
Mold Prevention: The 6-8 week fridge period is when mold becomes a real threat. To minimize risk, I recommend adding a thin layer of sand (about 1/4 inch) on top of the seeds before covering. This creates a barrier that prevents fungal spores from reaching the seeds. If you do spot mold, remove affected seeds immediately and restart with fresh mix—don't try to salvage them.
Light Transition Strategy: When moving your seeds from cold to warm in Step 4, I suggest doing it gradually over 2-3 days rather than all at once. Place the container in a cool, bright spot for the first day, then move it closer to your heat source each subsequent day. This mimics the natural spring thaw in the desert and helps prevent shock to the seeds.
Pro Tips for Plant Joshua Tree Seeds
- These little-known tricks will help you avoid common pitfalls and maximize your success rate with these desert surviv...
- Seed Selection: Always choose seeds from fully mature, brown pods—they should crack open easily when dry. If you can'...
- Stratification Container Choice: While plastic takeout boxes work perfectly, you can also use small seedling trays wi...
Frequently asked questions
Got questions about growing Joshua tree seeds? You’re not alone—these hardy desert natives can be tricky! Below, we’ve rounded up the most common questions (and answers) to help you troubleshoot, time your planting, and maximize success.
How long does it take for Joshua tree seeds to germinate?
With cold stratification, germination typically takes 4–8 weeks after planting. Some seeds may sprout sooner (2–3 weeks), while others need extra time—especially if stored improperly. Patience is key! Monitor soil moisture (keep it lightly damp) and avoid overwatering, which can cause rot.
Can I plant Joshua tree seeds directly outdoors without stratification?
Not recommended! Joshua tree seeds require cold stratification (4–6 weeks in the fridge) to break dormancy. Planting them straight into the ground without this step will likely result in zero germination. If you’re in a cold-winter climate, you can sow seeds outdoors in fall—the natural freeze-thaw cycle mimics stratification. Otherwise, stick to the fridge method.
What’s the best temperature for Joshua tree seed germination?
Ideal germination temps hover around 60–75°F (15–24°C) during the day, with cooler nights (50–60°F / 10–15°C). Avoid heat mats or direct sunlight until sprouts appear—too much warmth can dry out seeds. A bright windowsill or grow light works well once germination starts.
What if my Joshua tree seeds won’t sprout after stratification?
Don’t give up! Try these fixes:
- Check seed viability: Soak a few seeds in water overnight—if they sink, they’re likely viable. Floaters are probably dead.
- Adjust moisture: Overwatering suffocates seeds; underwatering dries them out. Aim for consistently damp (not soggy) soil.
- Test light conditions: Some seeds need indirect light to germinate. Move your tray to a shadier spot if mold appears.
- Try a second stratification: If seeds are old, repeat the cold treatment for another 2–4 weeks.
Are there easier desert plants to grow from seed?
Yes! If Joshua trees feel too finicky, try these low-maintenance alternatives:
- Palo Verde: Fast-growing, drought-tolerant, and germinates with minimal stratification.
- Desert Marigold (Baileya multiradiata): Bright blooms, thrives in poor soil, and sprouts readily.
- Agave: Hardy succulent with striking foliage—seeds germinate in 2–4 weeks with warmth.
Wrapping up and next steps
Growing a Joshua Tree from seed is a rewarding journey that blends patience with nature’s magic! 🌱 By following these steps—from cold stratification to nurturing your young sapling—you’re giving this desert icon a fighting chance.
Remember, consistency is key, and soon, you’ll watch those iconic arms emerge, symbolizing your green-thumb success.
Ready to take the next step? Once your seedling is thriving, research transplanting tips or explore Joshua Tree care guides to keep it happy long-term. Happy planting—your desert oasis awaits! 🌵✨