
Pruning
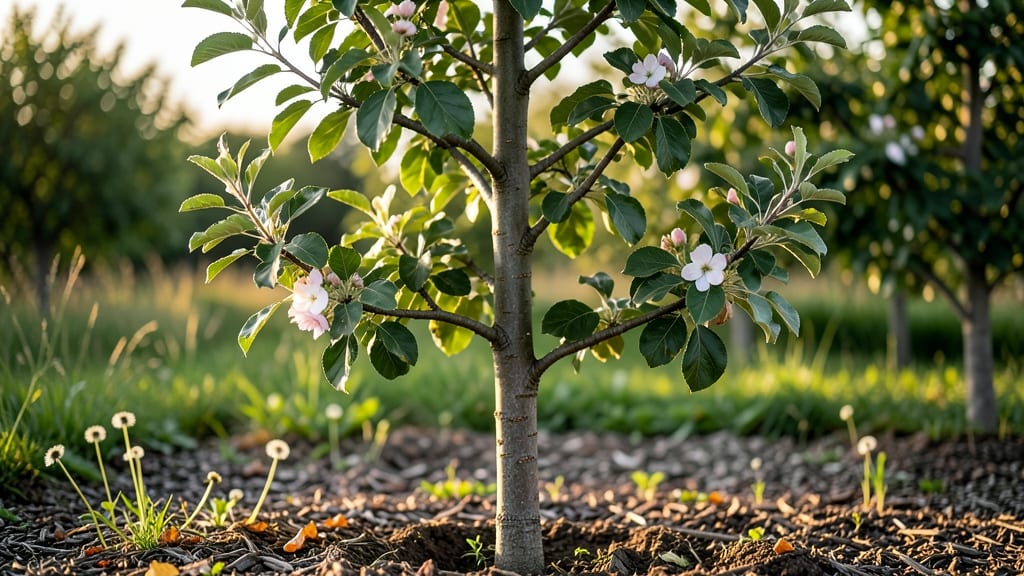
Your apple tree’s central leader shape starts with one simple cut—and it’s the foundation for years of strong growth and heavy fruit. 🌳 I’ve pruned dozens of apple trees using this method, and the difference in structure, fruit quality, and long-term health is night-and-day compared to neglected trees.
The key? Timing, tools, and a focus on keeping that single vertical leader dominant.
This method works year-round, though winter (dormant season) is ideal for major cuts. You’ll need sharp bypass pruners, loppers for thicker branches, and a clean workspace to avoid spreading disease.
The goal is to remove competing branches, water sprouts, and anything crossing the leader—all while encouraging airflow and sunlight to reach the center. Even a small tree benefits from this approach, and the payoff comes in fewer broken limbs and more consistent harvests.
By summer’s end, you’ll see your tree’s natural shape emerge: a strong central trunk with well-spaced scaffold branches. The leader stays unbroken, and side branches form naturally at wider angles.
This structure supports heavier fruit loads and makes future pruning easier. Plus, the tree’s energy stays focused on growth, not repairing weak limbs or competing leaders.
Common mistakes? Pruning too late in the season, leaving stubs, or over-thinning branches in one area. The central leader method is forgiving, but consistency matters—skip a year, and you’ll spend extra time fixing structural issues later. Start now, and you’ll have a tree that’s both beautiful and productive for decades.
📚 In This Guide
- What you need
- Instructions
- Tips and common mistakes
- Wrapping up and next steps
What you need
- ● Pruning shears or loppers – Sharp, clean, and sterilized (to prevent disease spread). Choose bypass pruners for clean cuts.
- ● Pruning saw – For thicker branches (1.5" or larger). A curved blade works best for apple trees.
- ● Rubbing alcohol (70% or higher) – To disinfect tools between cuts and prevent bacterial/fungal infections.
- ● Garden gloves – Heavy-duty, cut-resistant gloves to protect your hands from thorns and rough bark.
- ● Tarp or drop cloth – To collect fallen branches and debris for easy cleanup.
- ○ Permanent marker or tape – For marking branches that need removal (optional but helpful for planning).
- ● Pruning sealant – A tree wound dressing (like Tanglefoot Tree Wound Pruning Seal) to protect larger cuts from pests.
- ● Extension pole – For high branches (10–15 ft). A 3–4 ft telescoping pole with a pruner attachment saves your back!
- ● Ladder (safe & sturdy) – Only if you’re comfortable working at height. Ensure it’s non-slip and placed on level ground.
- ● Spray bottle with water – To dampen sawdust and reduce fire risk during hot/dry conditions.
- ● Notebook & pencil – To sketch your tree’s structure before and after pruning for reference.
How to prune an apple tree using the central leader method
Master this technique and you'll maintain a strong, productive apple tree with just one key cut each year.
🌱 Step 1: Identify the Central Leader and Main Scaffolding Branches
The central leader is your tree's vertical main trunk—this is the branch you'll preserve as the primary leader. Look for the strongest, straightest upward-growing branch that emerges from the trunk's base. I always check for a branch that's at least 3/4-inch thick and growing at a 45-60° angle from the trunk.
Next, identify the 4-6 main scaffolding branches that will form your tree's framework. These should emerge from the trunk at wide angles (60-90°) and be spaced 12-18 inches apart vertically. If your tree already has these, you're ready to prune. If not, you'll need to train new branches over time—this takes patience but ensures a sturdy structure.
✂️ Step 2: Make the Single Annual Cut to Maintain the Leader
Here's the moment that matters: find where the central leader has grown beyond your target height. I aim for 12-15 feet for standard trees, but adjust based on your space. Make your cut just above an outward-facing bud that's within 1/4 inch of the branch collar (that swollen area where the branch meets the trunk).
Use sharp bypass pruners to make a clean cut at a 45° angle sloping away from the bud. This angled cut helps water run off and prevents rot. Never cut flush with the trunk—you'll damage the branch collar and invite disease. If your tree has multiple competing leaders, remove all but the strongest one at the trunk's base during dormant season.
☀️ Step 3: Thin Out Competing Branches for Airflow
Remove any branches that cross or rub against the central leader or each other. These create wounds that invite pests and diseases. I also eliminate branches growing straight up from the scaffold limbs—these "water sprouts" steal energy from fruit production. Cut these back to their point of origin using clean pruning cuts.
Pay special attention to branches growing inward toward the tree's center. These block sunlight and airflow, creating a humid environment that encourages fungal diseases. Your goal is to leave an open vase-like structure where sunlight reaches all branches. After pruning, you should see clear sightlines through the tree's canopy from all angles.
⏰ Step 4: Time Your Pruning for Optimal Healing
For most apple varieties, prune during late winter or early spring before buds swell but before leaves emerge. This timing gives cuts time to heal before the tree's active growth season. Summer pruning is only for removing water sprouts—never make structural cuts during the growing season as it stresses the tree.
After pruning, apply a thin layer of pruning sealant to cuts larger than 1/2-inch diameter to prevent disease entry. For smaller cuts, let the tree's natural healing response take over—modern research shows sealants aren't necessary for cuts under 1/2 inch. Water deeply after pruning to help the tree recover from the stress.
Tips & tricks for perfect apple tree central leader pruning
This single cut keeps your apple tree thriving for years—here's how to make it foolproof.
Branch Angle Intelligence: When selecting your central leader in Step 1, prioritize branches growing at a 45-60° angle from the trunk. This angle creates natural structural strength while allowing sunlight penetration to lower branches. I've seen many gardeners mistakenly choose perfectly vertical branches that become weak under fruit weight. A slight outward bend at the base is actually ideal for long-term stability.
Cutting Precision: The 1/4-inch rule in Step 2 is critical—this distance above the branch collar ensures proper healing while maintaining the tree's natural defenses. I learned this the hard way when I cut too close to the collar on a young tree, which led to a fungal infection. Always use sharp bypass pruners and make your 45° angled cut just above that outward-facing bud. The angle matters: it prevents water pooling that causes rot.
Airflow Architecture: After removing crossing branches in Step 3, visualize your tree's canopy like an open vase. You should be able to see through the center from all directions. This isn't just about looks—proper airflow prevents fungal diseases like apple scab. I recommend marking branches you're considering removing with flagging tape first, then stepping back to check your "see-through" vision before making any cuts.
Seasonal Timing: The late winter/early spring window in Step 4 is your best chance for success. I've pruned in summer before, and while it works for water sprouts, structural cuts made during active growth stress the tree. Look for swollen buds that haven't yet opened—this is your perfect pruning signal. If you must prune in summer, limit yourself to removing only those vertical water sprouts growing straight up from scaffold branches.
Pro Tips for Apple Tree Central Leader
- This single cut keeps your apple tree thriving for years—here's how to make it foolproof.
- Branch Angle Intelligence: When selecting your central leader in Step 1, prioritize branches growing at a 45-60° angl...
- Cutting Precision: The 1/4-inch rule in Step 2 is critical—this distance above the branch collar ensures proper heali...
Frequently asked questions
Got questions about mastering the apple tree central leader technique? You’re not alone—this pruning method can seem tricky at first! Below, we’ve rounded up the most common queries to help you prune like a pro.
What’s the best time of year to prune an apple tree using the central leader method?
The ideal window is late winter to early spring (when the tree is dormant but before buds swell). This timing minimizes stress and disease risk. Avoid pruning in fall—it can encourage fungal infections. For young trees, you can also prune lightly in summer to shape growth.
How do I know if my apple tree is a good candidate for the central leader system?
Look for a single, strong, straight trunk with one dominant upright branch. If your tree has multiple competing leaders or is already bushy, it may need open-center pruning instead. Dwarf varieties often adapt well, while standard-sized trees benefit most from this method.
What if my central leader is damaged or broken? Can I still use this pruning style?
If the central leader is severely damaged, you’ll need to select a new leader from a strong, upright branch below the damage. Prune back competing branches to encourage the new leader’s growth. For minor damage, simply remove dead wood and redirect energy to the remaining leader.
Will pruning my apple tree’s central leader reduce fruit production?
Not if done correctly! Proper central leader pruning actually boosts fruit quality and yield by improving airflow and sunlight penetration. Just avoid over-pruning—remove no more than 25% of the tree’s canopy in one season. Thin out crowded branches to prioritize fruit-bearing wood.
Are there alternatives to the central leader method for small spaces?
Yes! For limited space, consider:
- Espalier training: Flatten the tree against a wall or fence.
- Open-center (vase) pruning: Encourages a wider, bushier shape.
- Dwarf varieties: Grow in containers or small orchards.
Wrapping up and next steps
Mastering the apple tree central leader pruning technique unlocks a lifetime of healthy, productive fruit trees with minimal effort! 🌳 By focusing on a single, strong central leader and strategic cuts, you’ll promote airflow, sunlight, and robust growth—all while keeping maintenance simple.
Whether you’re a seasoned gardener or just starting, this method is your secret to a thriving orchard with one simple cut each year.
Ready to transform your apple tree into a well-structured, fruit-bearing powerhouse? Grab your pruners, review your notes, and schedule your next session—spring or dormant season is your best bet! 🌱