
Trees
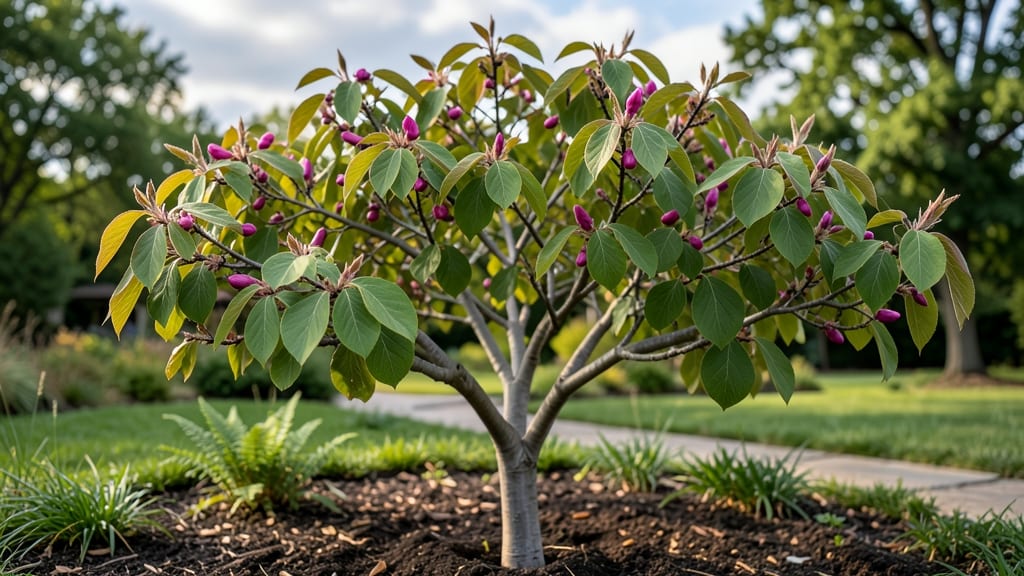
The heart-shaped leaves of the redbud tree (Cercis canadensis) turn every spring into a living postcard. 🌸 I planted mine three years ago, and now it’s covered in delicate pink blooms that appear before the leaves even unfurl—like nature’s own surprise party.
This small, shade-tolerant tree thrives in partial sun, making it perfect for yards with mixed light. The leaves emerge coppery-red before turning deep green, and the bark develops striking exfoliating patterns as it matures. Even in winter, its graceful shape adds structure to the landscape.
You’ll love how low-maintenance it is: water deeply once a week during dry spells, prune only to shape, and watch it reward you with years of effortless beauty. The blooms attract pollinators early in the season, too—nature’s way of saying thanks for planting it.
📚 In This Guide
- What you need
- Instructions
- Tips and common mistakes
- Wrapping up and next steps
What you need
- ● Redbud tree seeds or saplings: Seeds: 5–10 (for germination testing) or 20+ (for higher success rates). Tip: Buy from a reputable nursery for certified varieties!
- ● Saplings: 1–2 (3–6 inches tall, bare-root or potted). Look for healthy, disease-free specimens.
- ● Planting site: Full sun to partial shade (6+ hours of sunlight daily).
- ● Well-draining soil (pH 6.0–7.5). Amend clay soil with compost (1–2 bags, 40 lbs each).
- ● Tools: Trowel or hand shovel (for seed planting or transplanting).
- ● Garden gloves (to protect hands from thorns or rough bark).
- ● Watering can or hose with a gentle spray nozzle.
- ● Mulch (2–3 inches of wood chips or pine straw to retain moisture).
- ● Growth boosters: Slow-release fertilizer (balanced 10-10-10 or tree-specific formula).
- ● Mycorrhizal fungi (for root health—mix into soil at planting).
- ● Protective gear: Tree guard or wire mesh (to deter deer/browsing in young trees).
- ● Shade cloth (30–50% coverage for seedlings in hot climates).
- ● Monitoring tools: Soil moisture meter (to check watering needs).
- ● Pruning shears (for shaping or removing dead branches later).
How to grow a redbud tree with stunning heart-shaped leaves
Here's how to nurture this spring beauty from seed to showstopping bloom in just three years.
🌱 Step 1: Collect and Prepare Redbud Seeds
Harvest seeds from mature redbud pods in late summer or early fall when they turn brown and papery. I like to wait until they naturally open—they'll release flat, heart-shaped seeds inside. Remove any seeds with visible damage or insect holes, as they won't germinate well.
Clean the seeds by soaking them in lukewarm water for 24 hours to soften the outer coating. This step is crucial because redbud seeds have a hard seed coat that slows germination. After soaking, spread them on a paper towel to dry slightly—just until they're no longer slippery to the touch. Store them in a sealed container in the refrigerator for 60-90 days to complete stratification, mimicking winter conditions.
🪴 Step 2: Plant Seeds in Containers for Germination
Fill small pots (about 3-4 inches deep) with a mix of 50% potting soil and 50% perlite to ensure good drainage. Redbud seedlings hate soggy roots, and this mix prevents that. Plant 2-3 seeds per pot, pressing them just ¼ inch deep into the soil. Cover lightly with additional mix—don't bury them too deeply, or they'll struggle to emerge.
Water gently until the soil feels evenly moist but not saturated. Place the pots in a warm spot with indirect light (like a bright windowsill with sheer curtains) and maintain a temperature of 65-75°F. Germination can take 2-4 weeks, so be patient. You'll know it's working when you see the first tiny heart-shaped leaves pushing through the soil.
☀️ Step 3: Transplant Seedlings to the Garden
Wait until seedlings have 3-4 sets of true leaves and are at least 4-6 inches tall before transplanting. Choose a sunny location with full sun to partial shade—redbuds tolerate some afternoon shade but bloom best with morning sun. Dig holes twice as wide as the root ball but only as deep as the container.
Gently remove seedlings from their pots, tease the roots slightly to encourage outward growth, and place them in the holes. Fill with native soil, firming it gently around the base. Water deeply right after planting to settle the soil and eliminate air pockets. Space seedlings 10-15 feet apart to allow for mature growth—redbuds can reach 20-30 feet tall and wide.
💧 Step 4: Care for Young Trees Through the First Three Years
Water newly planted redbuds once a week during the first growing season, providing 1-2 gallons per tree to encourage deep root growth. After the first year, they'll be more drought-tolerant, but young trees still need consistent moisture. You'll know they're getting enough water when the soil feels dry 1-2 inches below the surface.
Apply a 2-inch layer of mulch around the base (but not touching the trunk) to retain moisture and suppress weeds. Redbuds are low-maintenance once established, but I fertilize lightly in early spring with a balanced 10-10-10 fertilizer to encourage healthy growth. Avoid heavy-handed feeding—redbuds prefer lean soil and over-fertilizing can lead to weak, leggy growth.
✂️ Step 5: Prune and Encourage Blooms
Prune your redbud in late winter or early spring before new growth begins. Remove any dead, diseased, or crossing branches first—this keeps the tree healthy and open. Then, shape the tree by cutting back any overly long branches to maintain a natural, balanced form. Redbuds bloom on old wood, so avoid heavy pruning after blooms appear.
Watch for the first pink or purple blooms in 3-5 years, depending on growing conditions. The heart-shaped leaves will follow, creating the stunning display that makes redbuds so beloved. If blooms are sparse, it might mean the tree needs more sunlight—redbuds thrive with at least 6 hours of direct sun daily. A little extra sunlight in the morning can make a big difference in bloom production.
Tips & tricks for perfect redbud tree growth
Here's what nobody tells you about growing these stunning trees from seed.
Stratification Secret: The 60-90 day cold treatment in Step 1 mimics winter conditions perfectly. I've found that using a standard refrigerator works great—just place the sealed container on a shelf where the temperature stays consistently around 35-40°F. This cold period breaks the seed's dormancy, which is why you'll see better germination rates. Don't skip this step, even if you're eager to plant!
Germination Environment: In Step 2, that 65-75°F temperature range is crucial for consistent germination. I've had the best success using a seedling heat mat set to 70°F under the pots. This creates a stable environment that mimics spring conditions. Watch for condensation on the inside of the pot—this is a good sign your seeds are waking up. If you don't have a heat mat, place the pots on top of your refrigerator during the day when it's cooler.
Transplanting Timing: Waiting for those 3-4 sets of true leaves in Step 3 is worth the patience. I've seen seedlings with just the first leaves struggle when transplanted too early. The extra leaves mean stronger roots and better chances of survival. When you do transplant, handle the seedlings gently—they're delicate at this stage. Tease the roots carefully with your fingers to encourage outward growth, but don't damage them.
Sunlight Strategy: For maximum blooms in Step 5, focus on morning sun rather than afternoon. I've noticed that redbuds planted in locations with intense afternoon sun can develop sunburned leaves. If your garden has limited sun, prioritize the morning hours. The 6 hours of direct sun requirement can be met with morning sun plus some filtered afternoon light—just monitor your tree's response and adjust pruning accordingly.
Pro Tips for Redbud Tree With Heart Shaped Leaves
- Here's what nobody tells you about growing these stunning trees from seed.
- Stratification Secret: The 60-90 day cold treatment in Step 1 mimics winter conditions perfectly. I've found that usi...
- Germination Environment: In Step 2, that 65-75°F temperature range is crucial for consistent germination. I've had th...
Frequently asked questions
Got questions about growing and enjoying your redbud tree with heart-shaped leaves? Here are some of the most common ones—plus quick, practical answers to help you get the most out of this stunning spring star!
How fast does a redbud tree grow, and when will it bloom?
A redbud typically grows 6 to 12 inches per year, reaching maturity (and its first blooms) in 3 to 5 years. Early spring is prime bloom time—expect vibrant pink or purple flowers before the leaves appear! Patience pays off, though: full foliage and heart-shaped leaves take a few seasons to really shine.
What’s the best climate for a redbud tree?
Redbuds thrive in USDA Zones 4–9, making them versatile for most U.S. gardens. They love full sun to partial shade and tolerate a range of soils, but well-draining, slightly acidic soil keeps them happiest. Avoid waterlogged spots—they hate soggy roots!
How do I prune a redbud tree to encourage more blooms?
Prune right after blooming (late spring) to shape the tree and remove dead branches. Avoid heavy pruning—redbuds bloom on old wood, so trimming too aggressively can reduce flowers. Focus on opening up the center for airflow and sunlight to reach inner branches.
Are redbud trees prone to pests or diseases?
Generally hardy, but watch for aphids, spider mites, or borers—especially if leaves look yellowed or spotted. Fungal issues like powdery mildew can occur in humid climates. Preventative care (like mulching and proper spacing) keeps problems at bay. A neem oil spray works well for mild infestations.
Can I grow a redbud tree in a container, or does it need to be planted in the ground?
While redbuds prefer ground planting, dwarf varieties (like ‘Alba’) can thrive in large containers (15+ gallons) for 2–3 years. Use well-draining potting mix and repot every 2–3 years. Just know: container-grown redbuds may bloom slightly later than in-ground trees.
Wrapping up and next steps
The redbud tree with its iconic heart-shaped leaves is a true springtime gem—easy to grow, stunning to behold, and perfect for adding charm to any garden.
With just a little patience and care, you can enjoy its vibrant blooms in as little as three years, transforming your outdoor space into a picturesque haven.
Ready to plant your own? Grab those seeds or saplings, find a sunny spot, and get growing! Your future spring blooms will thank you—🌸✨