
Pruning
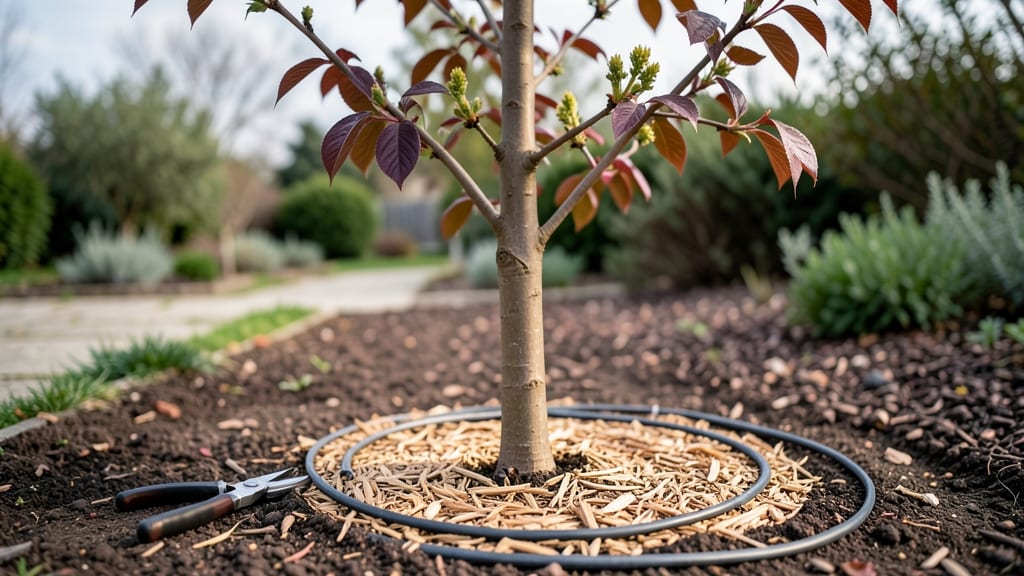
Your mulberry tree’s summer canopy starts with one sharp cut in early spring—when the buds swell but leaves haven’t emerged yet. ✂️ I’ve pruned mine for five years, and this dormant-season trick transforms weak branches into a dense, productive canopy by June.
The key? Timing, technique, and a little regional know-how to avoid common mistakes that leave trees stressed.
Grab your pruners and a bucket for clippings—you’ll need clean, sharp tools and a clear day (no rain forecast). Focus on removing dead wood first, then thin out crossing branches to let light reach the center.
Mulberries respond well to pruning, but overdoing it can delay fruiting. Think of it like giving your tree a haircut: shape matters more than volume.
By late spring, you’ll see new shoots bursting with energy, and those pruned branches will burst with juicy, sweet berries by summer. The tree’s root system strengthens during dormancy, so the pruning actually helps it recover faster.
Just avoid heavy pruning if your tree is young or struggling—patience pays off with bigger harvests down the road.
Works for both wild and cultivated varieties, from Zone 5 to Zone 9—just adjust timing by 1-2 weeks based on your last frost date. Early spring is the perfect window before pests wake up and sap starts flowing. Ready to shape that future berry bonanza?
📚 In This Guide
- What you need
- Instructions
- Tips and common mistakes
- Wrapping up and next steps
What you need
- ● Pruning shears: Bypass pruners (for cuts up to ½ inch thick) – 1 pair (look for sharp, stainless-steel blades for clean cuts).
- ● Loppers: For thicker branches (½ to 1½ inches) – 1 pair (choose ergonomic handles for comfort).
- ● Pruning saw: For branches over 1½ inches – 1 saw (fine-tooth blade for smooth cuts).
- ● Gloves: Heavy-duty gardening gloves (cut-resistant) – 1 pair (protects hands from thorns and rough bark).
- ● Disinfectant: 70% isopropyl alcohol or bleach solution (1 part bleach to 10 parts water) – small spray bottle (prevents disease spread).
- ○ Marking twine or tape: For tagging branches to remove – small roll (optional but helpful for large trees).
- ● Ladder (if needed): Sturdy, extendable ladder – 1 (ensure it’s tall enough for your tree’s height).
- ● Trash bags or bucket: For collecting pruned branches – 1-2 (keep your workspace tidy!).
- ● Hand saw or pruning knife: For precision cuts in tight spots.
- ● Tree wound dressing: (Controversial but some swear by it for large cuts.)
- ● Work boots or sturdy shoes: For stability on uneven ground.
- ● Safety glasses: To shield eyes from debris.
- ● Notebook & pen: To jot down notes on your tree’s structure.
Step-by-step guide to mulberry tree early spring pruning
Here's how to refresh your mulberry tree's structure while it's still dormant—before new growth even begins.
☀️ Step 1: Time Your Pruning for Ideal Conditions
Wait until late winter or early spring when the tree is fully dormant but before buds begin to swell. In most climates, this falls between mid-February and early March. You'll know it's the right time when the ground is thawed but no leaves have appeared yet. Pruning at this stage reduces stress on the tree and encourages vigorous new growth.
Check local frost dates to avoid pruning too early—new growth can be damaged by unexpected cold snaps. I like to prune on a dry, calm day when temperatures are above 40°F. This timing ensures the tree has enough energy to heal quickly and focus on summer's canopy expansion.
✂️ Step 2: Remove Dead, Diseased, or Damaged Branches
Start by identifying and cutting out any branches that are dead, diseased, or broken. Dead branches are typically dry, brittle, and often have no leaves or buds. Diseased branches may show signs like oozing sap, discoloration, or fungal growth. Use clean, sharp pruning shears to make cuts just outside the branch collar—the swollen area where the branch meets the trunk.
Real talk: Don't leave stubs. Cutting flush with the trunk can damage the tree's healing process. Instead, make your cut about 1/4 inch outside the collar. This small detail makes a huge difference in how quickly the tree recovers. Bag up the removed branches to prevent spreading any potential diseases to other parts of the tree.
🌿 Step 3: Thin the Canopy for Better Airflow
Next, focus on thinning the canopy to improve airflow and sunlight penetration. Look for branches that cross or rub against each other—these are prime candidates for removal. Also, remove any branches growing inward toward the center of the tree. You're aiming for an open, vase-like shape that allows light to reach all parts of the canopy.
Here's the thing—mulberry trees can get dense quickly, so don't be shy about removing up to 25% of the canopy if needed. Each cut should reduce the branch diameter by about 1/3. This selective thinning encourages stronger, more productive branches and reduces the risk of fungal diseases that thrive in shaded, damp conditions.
🌱 Step 4: Shape the Tree for Balanced Growth
Now it's time to shape the tree by selectively pruning branches to encourage a balanced, open structure. Start with the lower branches—remove about 1/3 of the smallest branches on the lower half of the tree. This opens up space for future harvesting and makes the tree easier to manage. Next, focus on the upper canopy, ensuring no single branch dominates the tree's shape.
Watch for branches that grow straight up or downward—these are called "water sprouts" and "suckers," respectively. Cut these back to a lateral branch or bud that faces outward. This redirects the tree's energy toward a more horizontal growth pattern, which is ideal for mulberry trees. You'll see the difference in just a few months as new growth fills in more evenly.
💧 Step 5: Clean Up and Monitor for Recovery
After pruning, clean up the area by removing all debris and sterilizing your pruning tools with a solution of 1 part bleach to 9 parts water. This prevents the spread of diseases between cuts. Apply a fresh layer of mulch around the base of the tree, keeping it 2-3 inches away from the trunk to prevent rot.
Monitor the tree closely over the next few weeks. You'll notice new growth beginning in 4-6 weeks, signaling that the tree is recovering well. If you see any signs of stress, like yellowing leaves or excessive wilting, provide additional water and avoid further pruning until the tree stabilizes. A properly pruned mulberry tree will reward you with a stronger, more productive canopy by summer.
Tips & tricks for mulberry tree early spring pruning
Took me years to perfect this process—here's how to avoid the mistakes I made while maximizing your tree's potential.
The Timing Secret: That 40°F minimum temperature isn't just arbitrary—it's when mulberry trees start actively healing. If you prune too early when temps dip below freezing, you'll shock the tree and delay spring growth by weeks. I always check the 5-day forecast before scheduling my pruning session to avoid unexpected cold snaps.
Branch Collar Technique: The 1/4-inch rule for cuts outside the branch collar is non-negotiable. I learned this the hard way when I cut too close to the trunk—it created ugly wounds that took years to heal. Use a small ruler or even a business card as a guide to maintain that precise distance. This simple step prevents disease entry points and helps the tree seal cuts naturally.
Canopy Thinning Strategy: When removing up to 25% of the canopy, focus on branches that are 1/3 the diameter of the trunk or smaller. These are the ones that will regenerate most vigorously. I always work from the inside out—removing inward-growing branches first creates instant airflow improvements. This systematic approach prevents over-pruning while still achieving that open vase shape.
Post-Pruning Recovery: That 4-6 week window for new growth is your best indicator of success. If you don't see fresh buds by week 6, your tree might be stressed from the pruning. I keep a pruning journal where I track weather conditions, cut sizes, and recovery timelines—it's helped me spot patterns in what works best for my local climate.
Pro Tips for Mulberry Tree Early Spring
- Took me years to perfect this process—here's how to avoid the mistakes I made while maximizing your tree's potential.
- The Timing Secret: That 40°F minimum temperature isn't just arbitrary—it's when mulberry trees start actively healing...
- Branch Collar Technique: The 1/4-inch rule for cuts outside the branch collar is non-negotiable. I learned this the h...
Frequently asked questions
Got questions about mulberry tree care in early spring? You’re not alone! Here are answers to the most common queries to help you prune with confidence and set your tree up for a lush summer canopy.
When is the exact best time to prune a mulberry tree in early spring?
Prune your mulberry tree before buds swell but after the last hard frost—typically late February to early April in most U.S. zones. This timing balances dormancy (when the tree is less stressed) with the need to avoid late-season pests. Check your local frost dates for precision!
Can I prune mulberry trees if there’s still snow on the ground?
Yes, but with caution! Light pruning (removing dead branches) is safe even with snow, but avoid heavy cuts until temperatures consistently stay above freezing. Cold stress can weaken the tree’s ability to heal. Wait for stable 40°F+ days for major pruning.
How do I know if I’ve pruned too much off my mulberry tree?
You’ve over-pruned if you’ve removed more than 25% of the canopy in one session. Signs include excessive weeping sap, sparse foliage the following spring, or branches dying back. Mulberries are resilient but thrive with moderate cuts—focus on shaping, not thinning.
Will pruning early affect fruit production later in the season?
Not if done correctly! Pruning in early spring boosts fruit production by improving air circulation and sunlight penetration. However, avoid heavy cuts to fruit-bearing branches—prioritize removing dead wood, crossing limbs, and suckers instead. Think of it as a spring spa day for your tree!
What’s the difference between pruning a mulberry tree and other fruit trees?
Mulberries are less finicky than apples or peaches—they tolerate harder pruning and regrow quickly. Key differences:
- Timing: Mulberries can handle earlier pruning (even late winter) vs. stone fruit trees.
- Shape: They don’t need strict “open-center” forms; focus on removing water sprouts and weak growth.
- Fruit vs. Foliage: Mulberries fruit on new wood, so aggressive pruning won’t kill production like it might for some trees.
Troubleshooting: My mulberry tree has blackened leaves after pruning—what went wrong?
Blackened leaves often signal fungal infection (like anthracnose) or pruning too late when buds are active. Solutions:
- Sterilize tools with 70% isopropyl alcohol before/after cuts.
- Prune earlier in the dormant season next year.
- Apply copper fungicide if spots spread (follow label rates).
Pro tip: If only a few leaves are affected, it’s likely natural die-off—mulberries shed old leaves in spring!
Wrapping up and next steps
Early spring is the perfect time to give your mulberry tree the care it needs for a lush, productive summer canopy! By pruning during dormancy, you’re setting the stage for better air circulation, stronger growth, and a bountiful harvest.
Whether you’re a seasoned gardener or just starting out, these dormant-season tricks will help you feel confident and connected to your tree’s growth cycle.
Now that you’re armed with the right tools and knowledge, roll up your sleeves and get pruning! 🌱 Start small—even a few strategic cuts can make a big difference. And remember, every expert was once a beginner, so take your time and enjoy the process. Happy pruning!