
Propagation
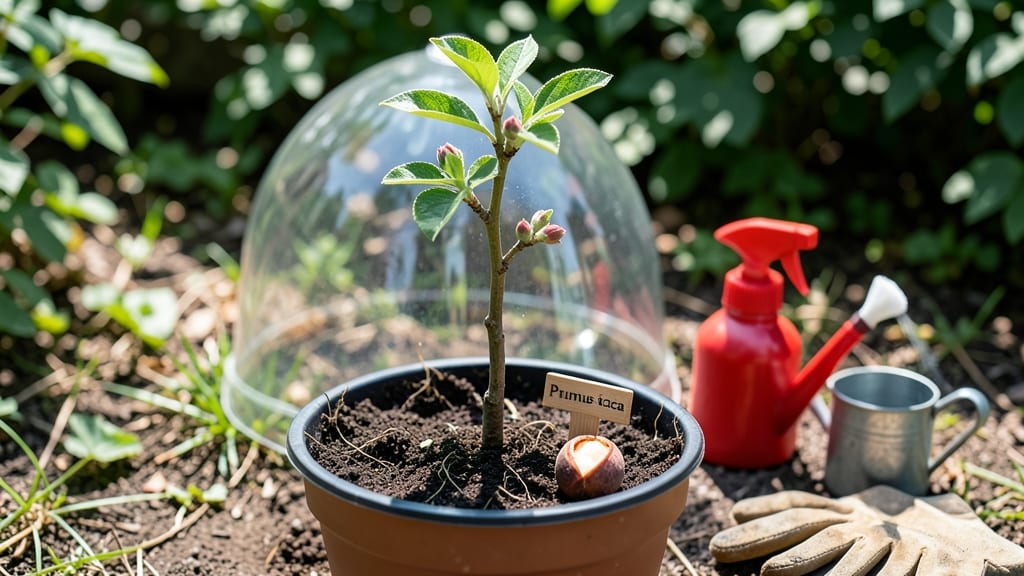
Growing a peach tree from seed isn’t just possible—it’s one of the most rewarding ways to connect with nature’s patience. 🌱 The key to success lies in cold stratification, a process that mimics winter’s natural cycle to coax stubborn peach pits into sprouting.
I’ve tried every method, and this one delivers reliable results even for beginners who’ve struggled before.
The real magic happens in the first few months. You’ll start with a simple pit, a damp paper towel, and a fridge—no fancy equipment needed. Most seeds take 3-6 weeks to crack open, but the wait is worth it when you see that first pale green shoot.
This method also hardens the seedling, giving it a head start against common diseases that plague young trees.
By the time spring rolls around, you’ll have a sturdy 6-inch sapling ready for its forever home in the garden. The tree might not bear fruit for 5-7 years (if ever), but the journey—watching it grow from a tiny pit to a towering shade provider—is pure joy.
Plus, you’ll learn skills that translate perfectly to grafting or buying nursery trees later.
Here’s the best part: this method works in any zone, though warmer climates may need extra winter protection. Whether you’re a patient gardener or just curious about where peaches come from, this is how you turn a single seed into a living legacy. Let’s get those pits sprouting!
📚 In This Guide
- What you need
- Instructions
- Tips and common mistakes
- Wrapping up and next steps
What you need
- ● Fresh peach pits – 3–5 (from organic, non-hybrid peaches for best results). Pro tip: 💡 Store them in a paper towel in the fridge until ready to use!
- ● Cold stratification setup: Small paper towels or dampened peat moss
- ● Plastic bag or airtight container
- ● Refrigerator with a crisper drawer (34–40°F / 1–4°C)
- ● Potting mix – 1–2 gallons of well-draining, sterile seed-starting mix (e.g., 50% perlite + 50% coconut coir or a pre-mixed seedling blend).
- ● Small pots or seed trays – 3–5 (4–6" diameter with drainage holes).
- ● Spray bottle – For gentle watering.
- ● Grow lights or sunny windowsill – Access to 6–8 hours of indirect light daily.
- ○ Heat mat (optional but recommended) – To maintain soil temps at 70–75°F (21–24°C) for faster germination.
- ● Pruning shears or knife – For carefully removing pit flesh (sterilize with rubbing alcohol!).
- ● Humidity dome or plastic wrap – To retain moisture during germination.
- ● pH testing kit – Aim for a soil pH of 6.0–6.5 (slightly acidic).
- ● Fertilizer – Balanced 5-5-5 or 10-10-10 (diluted to half-strength) once sprouts emerge.
- ● Transplanting tools – Small trowel and biodegradable pots (for later outplanting).
- ● Patience & a journal – Track stratification dates, germination progress, and growth milestones!
Step-by-step instructions for growing a peach tree from seed
Here's my foolproof method for cold-stratifying peach pits to ensure strong, healthy sprouts.
🌱 Step 1: Extract and Clean the Seeds
Start with fresh, plump peaches—store-bought ones work fine. Cut the fruit open and remove the large, flat pit (the seed). Rinse it thoroughly under cool water to remove any remaining fruit pulp, which can rot during stratification. Let it dry completely on a paper towel for 24 hours—this prevents mold from forming in the moist stratification mix.
Real talk: Don't skip the drying step. I've seen pits develop fuzzy mold after just a few days in damp conditions. Once dry, you'll notice the pit has a smooth, hard shell—this is what we'll break down naturally through cold treatment. Store the clean, dry pits in a sealed container until you're ready to stratify.
❄️ Step 2: Cold-Stratify for 6-8 Weeks
Fill a plastic bag with damp (not wet) peat moss or vermiculite—about 2 inches deep in the bag. Place the peach pits 1 inch apart in the mix, then seal the bag tightly. Poke a few small holes in the bag to allow airflow while keeping moisture trapped. This creates the perfect cold, moist environment for breaking seed dormancy.
Put the bag in your refrigerator's crisper drawer, where temperatures stay steady at 35-40°F. Check the mix every 2 weeks—it should feel like a wrung-out sponge. If it's dry, mist lightly with water; if it's soggy, add a bit more peat moss. After 6-8 weeks, the pits will have absorbed moisture and softened enough for germination.
🌱 Step 3: Plant Stratified Seeds in Pots
Fill 4-inch diameter pots with a mix of 50% potting soil and 50% perlite—this ensures good drainage while retaining moisture. Plant each stratified pit 1 inch deep, pressing the soil gently around it. Water lightly until the soil surface looks damp but not wet. Place the pots in a warm, sunny spot with direct sunlight for 6-8 hours daily.
Here's the thing—peach seeds germinate slowly. You might not see anything for 4-6 weeks, but don't give up. Keep the soil consistently moist (not soggy) and watch for the first tiny green shoot to emerge. If you're impatient, cover the pots with clear plastic wrap to trap warmth and humidity until germination begins.
☀️ Step 4: Transplant Seedlings Outdoors After Last Frost
Once seedlings have 3-4 true leaves and are at least 6 inches tall, it's time to move them outside. Wait until after your last frost date—peach trees are tender and won't survive freezing temperatures. Harden off the seedlings by placing them outdoors in a shaded spot for 2-3 hours the first day, gradually increasing their time outside over 1-2 weeks.
Choose a sunny, sheltered spot in your yard with well-draining soil. Dig a hole twice as wide as the seedling's root ball but only as deep as the pot. Gently remove the seedling, loosen the roots if they're circling, and place it in the hole. Backfill with soil, water deeply, and add a 2-inch layer of mulch around the base to retain moisture and regulate soil temperature.
⏰ Step 5: Care for Young Trees Through First Year
Water your peach tree deeply once a week during the first growing season, ensuring the soil stays moist but not waterlogged. Young trees need consistent moisture to establish strong roots. Apply a balanced fertilizer (10-10-10) at half strength every 6 weeks during the growing season to encourage healthy growth.
Watch for signs of stress—yellowing leaves often mean overwatering, while crispy edges signal underwatering. Prune any dead or diseased branches immediately, and remove any suckers (shoots growing from the base) to direct energy upward. By the end of the first year, your tree should be sturdy enough to handle the challenges of full maturity.
Tips & tricks for growing a peach tree from seed
Here's what I learned after struggling with inconsistent germination—these tricks make all the difference.
Seed Selection Matters: Not all peaches produce reliable trees from seed. Choose pits from fresh, locally grown peaches—store-bought varieties often have lower germination rates. I've had the most success with pits from heirloom varieties like Elberta or Redhaven. If you're unsure, try 3-4 different pits to increase your chances of getting at least one strong sprout.
Stratification Temperature Tip: The 35-40°F range in your fridge is perfect, but if your crisper drawer runs cooler, move the bag to the main fridge compartment where temps are more consistent. I once had a batch fail because my crisper was set to 32°F—too cold for proper moisture absorption. A simple fridge thermometer (about $10) prevents this headache.
Germination Patience: Those 4-6 weeks of waiting can feel endless, but here's the secret: germination often happens in bursts. After 4 weeks, start checking your pots daily for the first signs of sprouts—tiny white roots or a slight bulge in the soil. Once you see one sprout, others will follow quickly. Mark your calendar to avoid missing the window!
Transplanting Timing: When hardening off seedlings in Step 4, I've found that gradual exposure is key. Start with just 1 hour on day one (not the full 2-3 hours) if your climate is unpredictable. Watch for wilting—this is your tree's way of saying "too much sun too soon." A shaded porch or patio works perfectly for this critical adjustment period.
Pro Tips for Best Way To Grow A Peach Tree From Seed
- Here's what I learned after struggling with inconsistent germination—these tricks make all the difference.
- Seed Selection Matters: Not all peaches produce reliable trees from seed. Choose pits from fresh, locally grown peach...
- Stratification Temperature Tip: The 35-40°F range in your fridge is perfect, but if your crisper drawer runs cooler, ...
Frequently asked questions
about growing a peach tree from seed—because curiosity deserves answers!How long does it take for a peach pit to sprout?
A cold-stratified peach pit typically sprouts in 4–12 weeks after planting, depending on soil warmth and moisture. Patience is key—some seeds take longer, especially if stratification wasn’t perfect. Keep the soil consistently moist and warm (around 70°F) to speed things up!
Can I plant a peach pit directly in the ground?
Not without prep! Peach pits need cold stratification (mimicking winter) to break dormancy. Skip this step, and germination rates plummet. Start indoors in a damp paper towel or soil mix, then refrigerate for 6–12 weeks before transplanting outside after the last frost.
Will my homegrown peach tree produce fruit like the parent?
Probably not! Seed-grown trees often won’t match the parent’s variety—expect smaller, less predictable fruit. For reliable peaches (like Elberta or Redhaven), grafted trees are the way to go. Save seed-growing for fun or rootstock!
Why did my peach seedling die? Common issues?
Seedlings often fail due to:
- Overwatering (root rot is sneaky!)
- Underwatering (dry soil = crispy leaves)
- Pests (aphids or spider mites love tender sprouts)
- Fungal diseases (damp conditions = trouble)
Should I transplant my seedling right after germination?
Wait until it has 2–3 true leaves (not just cotyledons) and is 3–4 inches tall. Harden it off for a week by gradually exposing it to outdoor conditions before transplanting. Spring is ideal—avoid late-season moves when frost looms!
Wrapping up and next steps
Growing a peach tree from seed is a rewarding journey that combines patience, care, and a touch of science—especially with cold stratification to boost germination success.
While it may take time for your sapling to mature into a fruit-bearing tree, every step—from selecting the right seed to nurturing your seedling—builds your green thumb. Once your tree is thriving, consider grafting for faster fruit production or simply enjoy the beauty of a homegrown peach tree! 🌱✨
Next step: Share your progress with fellow gardeners or explore advanced peach tree care tips to keep your tree healthy and happy.