
Pruning
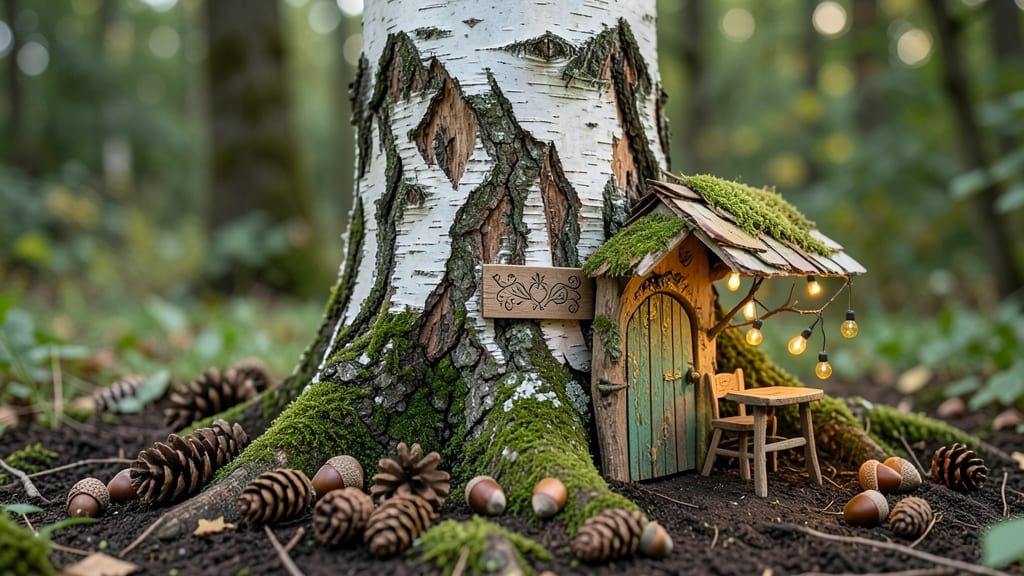
Turn a tree trunk into a fairy's dream home with just a few supplies and a little imagination. 🌿 I've transformed ordinary tree stumps into storybook shelters that make my garden feel like a secret world waiting to be explored.
The magic starts with selecting the right trunk—one with natural hollows or a flat top works best. Gather moss for walls, twigs for furniture, and flowers for a welcoming entrance. Even a simple stump can become a cozy cottage with some creativity.
You'll create a tiny world that feels alive with personality. The fairy door might be a tiny shell, the roof a slice of bark, and the furniture made from acorns and pebbles. It's not just decoration—it's an invitation to slow down and notice the small wonders around you.
Perfect for any garden, from shady corners to sunny clearings. The best part? Your fairy home will evolve with the seasons as you add new decorations and watch nature weave its own magic into the design.
📚 In This Guide
- What you need
- Instructions
- Tips and common mistakes
- Wrapping up and next steps
What you need
- ● Tree trunk or large branch: 3–6 inches in diameter, 12–24 inches long (preferably hollow or with natural cavities). Bonus points if it has bark texture!
- ● Natural fillers: Dried moss (½–1 cup)
- ● Small pebbles or sand (¼–½ cup)
- ● Twigs or bark chips (handful)
- ● Adhesives & sealants: Non-toxic wood glue or hot glue (small bottle)
- ● Waterproof sealant (e.g., Mod Podge Outdoor or clear varnish, 4–6 oz)
- ● Roofing: Thin bark slices or a small piece of slate/shale (if available)
- ○ Optional: Acrylic paint (for coloring roof edges)
- ○ Safety gear: Gloves (1 pair), safety goggles (optional)
- ● Crafting tools: Utility knife or small saw (for trimming)
- ● Paintbrush (½ inch wide)
- ● Scissors (for moss/foliage)
- ○ Decorative touches (optional): Acrylic paint (earth tones or pastels)
- ● Miniature door/doorway (wooden or cardboard)
- ● Fairy lights (battery-operated, solar-powered)
- ● Glitter or biodegradable glitter (sparingly!)
Step-by-Step instructions for crafting whimsical fairy tree trunk homes
Transform an ordinary tree trunk into a magical fairy abode with these easy, enchanting steps.
🪴 Step 1: Select and Prepare the Tree Trunk
Choose a small, fallen tree trunk—about 12-18 inches in diameter—that’s already weathered or dry. Avoid fresh cuts, as sap can attract pests. Use a hacksaw or handsaw to slice off one end at a slight angle (about 15 degrees), creating a natural-looking opening for the fairy door. Sand the edges smooth with medium-grit sandpaper to prevent splinters.
Here's the thing—fairies love texture! Before painting, lightly brush the trunk with a stiff-bristle brush to rough up the bark slightly. This gives your fairy home a rustic, lived-in look. If your trunk has moss or lichen, leave it—fairies adore that earthy charm. Just make sure it’s stable enough to stand on its own or anchor it with landscape stakes if needed.
🎨 Step 2: Paint and Decorate the Exterior
Break out the acrylic paints and get creative! Start with a base coat of light gray or brown to mimic natural wood tones, then add whimsical details. Use a fine-tip paintbrush to paint tiny windows, shutters, or flower boxes along the sides. I like to add tiny mushrooms at the base or vines winding up the trunk—fairies love a cozy, storybook feel.
Let each layer dry completely before adding more details. Pro tip: Mix a little white paint into your darker colors to create a weathered, aged look. Once dry, seal everything with outdoor varnish to protect your masterpiece from rain and sun. This keeps the colors vibrant and the wood sturdy for years of fairy visits.
✂️ Step 3: Craft and Install the Fairy Door
Now for the magic—the fairy door! Cut a small rectangle (about 3x4 inches) from balsa wood or thin plywood for the door itself. Paint it a bright color like red, green, or blue, then add tiny hinges using miniature screws and a small nail as a knocker. I’ve seen fairies leave tiny offerings on doors like this, so make it special!
Attach the door to the trunk’s opening with wood glue and a few small nails or miniature screws. Leave a tiny gap at the bottom so rainwater can drain out—fairies hate soggy floors! For extra charm, add a tiny doormat (cut from felt) or a miniature lantern (made from a small glass jar or painted bottle cap) nearby.
🌿 Step 4: Add Finishing Touches and Surroundings
Fairies need a welcoming home, so surround your trunk with natural elements. Scatter small pebbles, moss, or tiny flowers around the base to create a fairy garden path. Use twine or thin wire to weave a tiny fence or bridge nearby—fairies love to travel! I also like to add a miniature bench (carved from a small log) or a tiny well (a painted acorn cap filled with pebbles).
For extra whimsy, hang tiny wind chimes (made from seashells or beads) or fairy lights (battery-operated) nearby. Place your creation in a shady, secluded spot in your garden where it feels like a secret hideaway. Fairies are shy creatures—they’ll only visit if they feel safe and cozy!
💧 Step 5: Maintain and Invite the Fairies
Your fairy home isn’t just for show—it’s a living part of your garden! Check it occasionally for signs of fairy activity: tiny footprints (use a fine paintbrush to "paint" them on), moved pebbles, or offerings like glitter, flower petals, or tiny acorns. If the paint fades, touch it up with a small brush and leftover paint.
Fairies love routine, so leave out tiny treats occasionally—dewdrop "water" (glittery spray paint), flower petals, or shiny stones. Avoid real food (ants will swarm!), but a dash of glitter or a sparkly pebble works perfectly. Over time, you might notice new additions—fairies often bring their own decor, like tiny mushrooms or acorn caps, to personalize their home.
Tips & tricks for crafting whimsical fairy tree trunk homes
Between us, these little details make all the difference between a charming fairy home and something that looks like it belongs in a child's coloring book. Let me share what I've learned after crafting a few of these magical little shelters.
Texture is Everything: In Step 1, when you're roughing up the bark with a stiff-bristle brush, don't hold back! Fairies love that lived-in look, and the texture gives your paint a better grip. I've found that using a sanding sponge instead of paper can create even more interesting patterns while being easier on your hands. For extra dimension, you can also lightly carve tiny grooves with a craft knife before painting—just be careful with the sharp edges!
Door Design Matters: The fairy door in Step 3 is where you can really get creative, but there are a few key things to remember. First, make sure your door is perfectly square—fairies are particular about their geometry! I've found that using a ruler and pencil to mark the dimensions before cutting helps prevent wonky doors. Also, consider adding a tiny "knocker" made from a small bead or acorn cap instead of just a nail—it adds that extra touch of whimsy that makes the whole project feel special.
Weatherproofing Secrets: In Step 2, when you're sealing everything with outdoor varnish, don't just give it one quick coat. I've learned the hard way that fairy homes need at least two thin coats of varnish to really protect against rain and sun. Let each coat dry completely (usually about 2-3 hours) before adding the next. For extra durability, you can mix a tiny bit of clear nail polish into your final coat—it adds an extra layer of protection without changing the appearance.
Lighting Up the Magic: For Step 4, if you're using fairy lights, I've found that solar-powered ones work best—they're easy to install and won't require you to remember to change batteries. Place them strategically around your fairy home, especially near the door and windows, to create that magical glow. You can also use LED tea lights inside the trunk (if it's hollow) for an even more enchanting effect. Just make sure to use waterproof lights if your fairy home might get wet!
Pro Tips for Tree Trunk Fairy Home
- Between us, these little details make all the difference between a charming fairy home and something that looks like ...
- Texture is Everything: In Step 1, when you're roughing up the bark with a stiff-bristle brush, don't hold back! Fairi...
- Door Design Matters: The fairy door in Step 3 is where you can really get creative, but there are a few key things to...
Frequently asked questions
Got questions about creating your own tree trunk fairy home? You’re not alone! Here are some of the most common queries—and their answers—to help you bring your garden magic to life.
What’s the best type of tree trunk for a fairy home?
Look for dead or hollowed-out tree trunks (like willow, oak, or apple) with natural cavities or soft spots. Avoid live trees—fairies need space to thrive! If your trunk is too small, stack smaller logs or use a hollowed-out stump for extra charm. Pro tip: Check for rot or pests before crafting!
How long does it take to build a fairy home?
Most projects take 1–3 hours, depending on complexity. Simple designs (like moss-covered logs) can be done in under an hour, while elaborate ones (with bridges or tiny doors) may require a weekend. Timing hack: Gather materials first—dry moss, pebbles, and twigs save time!
Can I use artificial materials (like plastic mushrooms) instead?
Artificial materials are great for durability and low-maintenance gardens. Just balance them with natural elements (like real bark or flowers) to keep the magic alive. Fairy-friendly swap: Try resin mushrooms or painted stones for a long-lasting touch.
What if bugs or animals move into my fairy home?
Fairy homes are eco-friendly shelters—bugs and critters might visit! To deter pests, avoid decaying wood or damp areas. Place your home in sunny, well-ventilated spots and use natural repellents like citrus peels or cedar chips. Remember: Fairies share their homes!
How can I make my fairy home stand out?
Add personalized touches like tiny doors (bark slices), fairy lights (solar-powered), or painted symbols. Use contrasting colors (e.g., white pebbles on dark wood) for visual pop. Bonus idea: Hang a mini wind chime or acorn “lantern” for extra whimsy!
Wrapping up and next steps
Creating a tree trunk fairy home is more than just a craft—it’s a magical invitation to spark joy in your garden! With just a few natural materials and a dash of creativity, you’ve turned an ordinary tree into a tiny sanctuary for fairies (or your inner child).
Whether you’re a seasoned crafter or a beginner, this project proves that small spaces can hold big enchantment.
Ready to bring more whimsy to your outdoor space? 🌿✨ Next, why not expand your fairy garden? Add moss pathways, tiny bridges, or even a mini water feature to complete the fantasy. Happy crafting—and may your fairies approve!