
How To
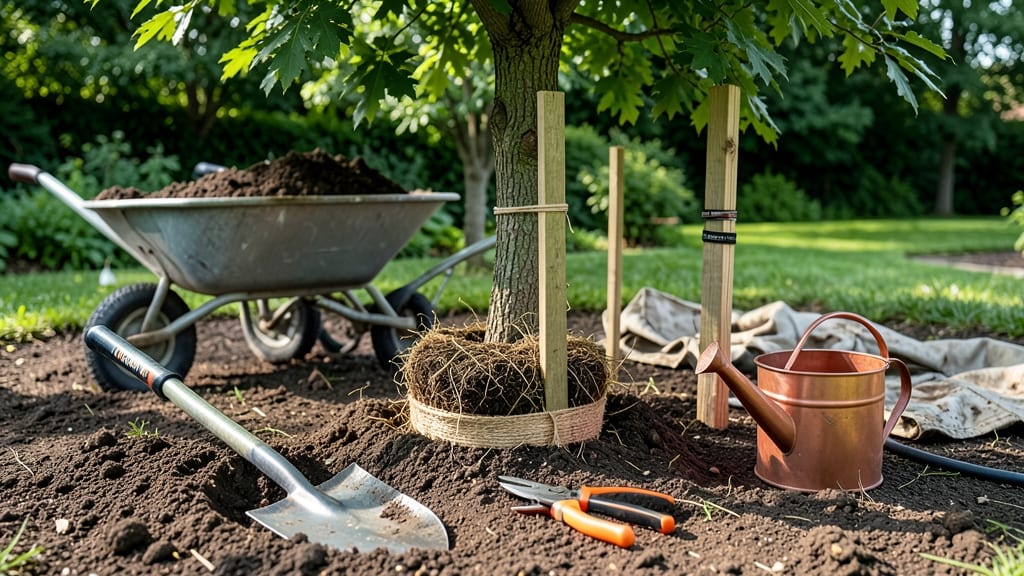
Transplanting a tree without killing it starts with the right timing and technique. 🌳 I’ve moved trees from shady spots to sunny ones—and kept them thriving—by following these key steps: prune before digging, protect the roots, and water deeply afterward. The secret isn’t brute strength; it’s patience and preparation.
Most people rush the process, but the best time is late fall or early spring when trees are dormant. Dig a wide trench around the tree first, then lift the root ball carefully, keeping as much soil attached as possible.
A burlap wrap helps support the roots during transport. After planting, water thoroughly and mulch to lock in moisture—this keeps stress low and recovery smooth.
📚 In This Guide
- What you need
- Instructions
- Tips and common mistakes
- Wrapping up and next steps
What you need
- ● Shovel or spade: A sturdy, sharp-edged spade (at least 12–18 inches wide) for digging the root ball and new hole. Pro tip: A tree spade (like the Fiskars Rhino) is ideal for delicate roots!
- ● Pruning shears or handsaw: For trimming roots (if needed) and shaping the tree post-transplant. A bypass pruner is gentler on branches.
- ● Wheelbarrow or tarp: To transport soil and the root ball without damaging roots. A 50+ gallon capacity wheelbarrow works best for medium-sized trees.
- ● Measuring tape: To gauge the root ball size and new hole dimensions (aim for 2–3 times wider than the root ball).
- ● Garden hose or bucket: For watering before, during, and after transplanting. 5+ gallons of water per tree is a good rule of thumb.
- ● Burlap or landscape fabric: To wrap the root ball (if transplanting bare-root) and protect it during transport.
- ○ Stakes and twine: (Optional but helpful) To temporarily support the tree if it’s top-heavy or in a windy area.
- ● Timing: Transplant during the tree’s dormant season (late fall or early spring) for minimal stress. Avoid extreme heat or frost!
- ● New planting site prep: Test soil pH and drainage (a soil test kit helps). Amend with compost or peat moss if needed.
- ● Mulch: 2–4 inches of organic mulch (wood chips, pine straw) to retain moisture and regulate soil temp. Skip mulch touching the trunk!
- ○ Root stimulator: (Optional) A mycorrhizal fungi or rooting hormone (like Rootone) can boost survival rates for struggling trees.
- ● Safety gear: Gloves, long sleeves, and closed-toe shoes to protect against thorns, roots, and soil-borne pathogens.
Step-by-Step instructions for transplanting a tree without killing it
Transplanting a tree successfully requires careful timing and technique—here's how to minimize shock and ensure survival.
🪴 Step 1: Prepare the New Location and Dig the Hole
Choose a site with similar sunlight and soil conditions to the tree's current location. The hole should be twice as wide as the root ball but only as deep—planting too deep suffocates roots. Use the excavated soil to backfill later, mixing in compost if your native soil is poor.
Loosen the sides of the hole with a shovel or hands to encourage root spread. Avoid compacting the soil—this restricts future growth. If the soil is heavy clay, consider amending it with sand or peat moss to improve drainage. Water the hole thoroughly 24 hours before transplanting to settle the soil.
🌱 Step 2: Prune Roots and Lift the Tree Carefully
Two weeks before moving, begin root pruning by digging a trench around the tree's drip line. Cut roots with clean pruners, removing no more than 25% of the root system—this reduces transplant shock. For larger trees, hire a professional if the root ball exceeds 3 feet in diameter.
On transplant day, dig a clean root ball around the tree, keeping it intact. For small trees, use a spade to slice a 12-inch deep circle; for larger specimens, wrap the root ball in burlap to protect it. Lift the tree slowly, keeping the root ball moist—never let it dry out. If the tree resists, water the root ball first to loosen the soil.
💧 Step 3: Position and Backfill the Tree
Place the tree in the hole so the top of the root ball sits 1-2 inches above ground level. This prevents soil from settling and burying the trunk over time. Spread roots outward gently—never force them. Fill the hole with the reserved soil, tamping lightly every 6 inches to eliminate air pockets.
Create a wide, shallow basin around the base to direct water to the roots. Water deeply immediately after planting to settle the soil and eliminate air gaps. Avoid compacting the soil with your feet—this restricts root growth. Mulch the area with 2-3 inches of organic mulch, keeping it 6 inches away from the trunk to prevent rot.
☀️ Step 4: Provide Post-Transplant Care
Shade the tree for the first 2-3 weeks with a lightweight fabric or temporary structure to reduce stress. Water deeply every 3-5 days until new growth appears, checking that the soil remains moist but not soggy. Overwatering suffocates roots—always let the top 2 inches of soil dry slightly between waterings.
Fertilize only after 6-8 weeks with a balanced, slow-release fertilizer. Avoid high-nitrogen products—they encourage leafy growth at the expense of root development. Monitor the tree for signs of stress, like wilting or yellowing leaves, which may indicate overwatering or poor drainage. Prune any broken branches immediately to reduce further strain.
Tips & tricks for successful tree transplanting
These essential insights will help you avoid common pitfalls and give your transplanted tree the best chance to thrive.
Root Pruning Strategy: When you begin root pruning two weeks before transplanting, focus on cutting only the largest, most vigorous roots—these are the ones that will regenerate fastest. Use sharp, clean pruners to make clean cuts, and avoid removing more than 25% of the root system. This careful approach prevents excessive shock while still encouraging new root growth in the fresh location.
Soil Preparation Insight: The 24-hour advance watering of the planting hole isn't just about settling soil—it's about creating ideal conditions for root establishment. If your native soil is particularly dense, consider adding a handful of organic matter like compost to the bottom of the hole before backfilling. This creates a nutrient-rich zone right where the roots will first encounter fresh soil.
Positioning Precision: When placing your tree in Step 3, pay special attention to the 1-2 inch elevation above ground level. This small margin prevents the trunk from settling too deeply over time, which can lead to girdling—a condition where roots grow against the trunk and restrict growth. Use a level to ensure the tree sits perfectly upright before backfilling.
Mulching Technique: The 2-3 inch layer of organic mulch serves multiple purposes beyond moisture retention. It also regulates soil temperature and suppresses weeds, both critical factors for young transplants. Remember to keep mulch 6 inches away from the trunk to prevent moisture buildup that could cause rot. Consider using shredded bark or wood chips for the best long-term results.
Pro Tips for Transplant A Tree Without Killing It
- These essential insights will help you avoid common pitfalls and give your transplanted tree the best chance to thrive.
- Root Pruning Strategy: When you begin root pruning two weeks before transplanting, focus on cutting only the largest,...
- Soil Preparation Insight: The 24-hour advance watering of the planting hole isn't just about settling soil—it's about...
Frequently asked questions
Got questions about transplanting a tree without causing damage? You’re not alone—this process can feel tricky! Below, we’ve rounded up the most common concerns and provided clear, actionable answers to help you feel confident before digging in.
When is the best time of year to transplant a tree?
The ideal window is late fall to early spring (dormant season), when trees aren’t actively growing. Avoid extreme heat or frost—aim for 6–8 weeks before the first hard freeze or after the last frost in spring. Evergreens can handle early spring transplants, but deciduous trees thrive in cooler months.
How do I know if my tree is healthy enough to transplant?
Check for these signs of good health: vibrant leaves, minimal pest/disease damage, and steady growth over the past year. Avoid transplanting trees with root rot, dead branches, or signs of stress (yellowing leaves, oozing sap). If in doubt, consult an arborist—some trees (like mature oaks) rarely recover from transplant shock.
Can I transplant a tree in a pot or container?
Yes! Container-grown trees (like young fruit trees or bonsai) transplant more easily than field-grown ones. Just ensure the pot has drainage holes and use well-draining soil. For larger potted trees, water thoroughly 1–2 days before moving to reduce root damage. Field-grown trees need extra care—root balls must be at least 12–18 inches wide for stability.
What should I do if my tree’s leaves turn brown after transplanting?
Brown leaves are often a sign of transplant shock, but don’t panic! Prune affected leaves to redirect energy to root growth. Keep the soil consistently moist (not soggy) and avoid fertilizing for 4–6 weeks. If browning spreads rapidly or the tree wilts, it may need extra shade and deep watering. Most trees recover in 6–12 months with proper care.
Is it better to hire a professional or DIY?
It depends on the tree’s size, age, and species. DIY works well for small trees (<10 feet tall) or container-grown plants, but professionals are worth it for:
- Mature trees (20+ years old)
- Species prone to stress (e.g., maples, willows)
- Trees near structures or power lines
- Poor soil conditions or slopes
Wrapping up and next steps
Transplanting a tree doesn’t have to be a high-stakes gamble—with the right prep, patience, and care, your plant can thrive in its new home! 🌳✨ By choosing the perfect timing, digging carefully, and supporting its roots, you’re giving your tree the best shot at a stress-free transition.
Remember, even the toughest trees need a little TLC during the move.
Now that you’re armed with the know-how, roll up your sleeves and pick a sunny day to get started! Whether it’s a young sapling or a mature shade tree, your green thumb is about to make a big difference. Happy transplanting! 🌱💚