
Pruning
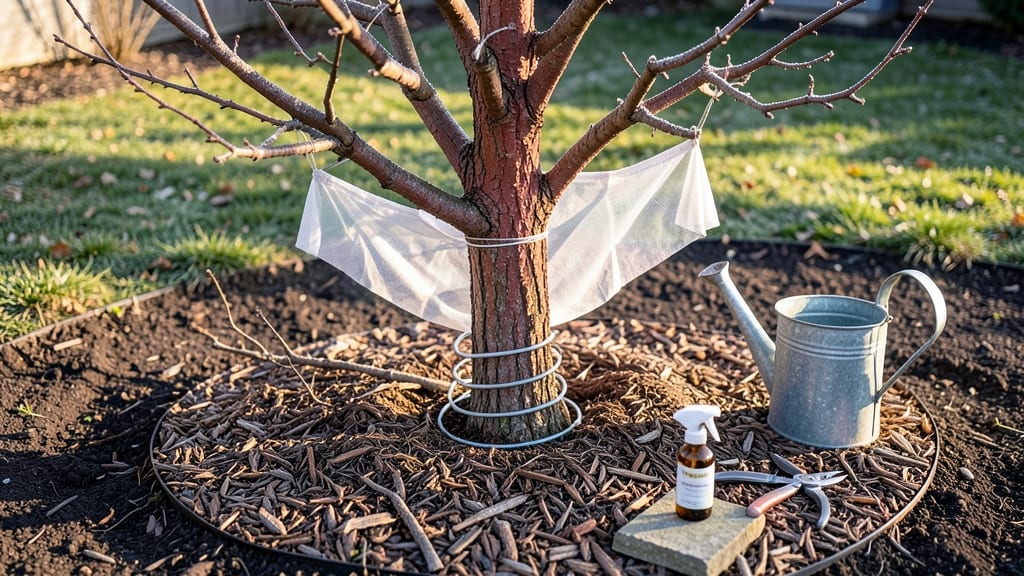
Your fruit trees can thrive with fruit tree winter protection—this is how I’ve kept mine thriving through sub-zero temperatures for five straight winters. 🌳 The secret isn’t just wrapping trunks or piling mulch; it’s combining methods to create a microclimate that mimics nature’s protection.
I learned this after losing three young apple trees to frost cracks, and now my orchard looks better after winter than most neighbors’ do in spring.
Start with cold-hardy varieties—like Honeycrisp apples or Haralson peaches—that handle your zone’s lows without extra fuss. Then, prune in late winter to remove weak branches before cold sets in, and wrap trunks with tree guard to prevent sun scald and frost cracks.
The real game-changer? A 3-inch layer of straw mulch around the base, topped with a thick blanket of leaves or burlap to trap heat.
By spring, you’ll see buds swelling weeks earlier than unprotected trees, and the roots stay warm enough to keep feeding through mild winter thaws. The key is checking insulation monthly—remove it on warm days to prevent rot, then replace it before hard freezes.
Even in Zone 5, where winters can drop to -20°F, this method keeps my trees productive year after year.
This works for peaches, cherries, and even citrus in sheltered microclimates—just adjust the insulation thickness based on your zone. The payoff? Trees that bounce back faster, fewer frost cracks, and fruit that ripens 2 weeks earlier than unprotected varieties. Let’s get your orchard winter-ready the right way.
📚 In This Guide
- What you need
- Instructions
- Tips and common mistakes
- Wrapping up and next steps
What you need
- ● Burlap or landscape fabric: 10–20 sq. ft. per tree (depending on size). Opt for breathable fabric (30–50% shade cloth) to allow airflow.
- ● Mulch: 2–3 inches of straw, wood chips, or shredded leaves per tree. Avoid fresh sawdust or bark mulch (it can compact or mold).
- ● Tree wrap or bubble wrap: 1–2 rolls (2–3 inches wide) to protect trunks from sunscald and rodent damage.
- ● Stakes or metal rings: 2–4 per tree (if wrapping trunks tightly). Use galvanized or plastic-coated stakes to prevent rust.
- ● Pruning shears: Sharp, sterilized shears (or a saw for thicker branches) to trim dead/damaged wood before insulating.
- ● Watering can or hose: For a deep watering 1–2 weeks before the first frost (encourages root hardening).
- ● Reflective foil or aluminum tape: Wrap around trunks for extra sunscald protection in sunny winters.
- ● Heat mats or electric tree wraps: For extreme freeze zones (check local climate needs).
- ● Bird netting: Lightweight netting to deter rodents from chewing bark.
- ● Compost or manure: A top-dressing layer (1–2 inches) before mulching for added nutrients.
- ● Thermometer: A soil or air thermometer to monitor microclimates around your trees.
How to protect fruit trees in cold climates
Cold snaps can devastate fruit trees—here’s my proven method to shield them through winter.
🪴 Step 1: Wrap the Trunk with Tree Guard
Start by wrapping the trunk with tree guard or burlap to prevent rodent damage and insulate against temperature swings. I like to use a 3-foot wide strip that extends from the base up to the first major branch. Secure it snugly but not tightly—you want it to breathe slightly.
If you’re in an area with heavy snow, add a second layer of cardboard around the base to block cold air from seeping into the soil. This creates a barrier that keeps the root zone warmer, which is just as critical as protecting the trunk itself.
☀️ Step 2: Build a Windbreak and Mulch the Base
Construct a windbreak using burlap sacks, straw bales, or even snow piled against the north and west sides of the tree. Wind is the real enemy—it strips heat away and can freeze exposed branches. A 3-foot-high barrier is usually enough to break the worst of it.
Next, spread 4-6 inches of mulch (straw, wood chips, or leaves) around the tree’s drip line—that’s the outermost branch tips. Keep mulch 6 inches away from the trunk to prevent rot. This layer traps heat in the soil and prevents freeze-thaw cycles that can heave roots.
✂️ Step 3: Bundle Branches for Heavy Freezes
For young trees or delicate varieties like peaches, gently tie branches together with soft twine or old pantyhose to create a bundle. This reduces surface area exposed to cold air and helps retain heat. Leave space between branches so they don’t smother each other.
If your tree is under 10 feet tall, you can drape it with burlap or frost cloth and secure it loosely with stakes. Avoid plastic—it traps moisture and can cause rot. The goal is to slow heat loss, not create a greenhouse effect.
⏰ Step 4: Monitor and Adjust for Extreme Drops
Check your trees every few days during deep freezes. If temperatures are forecast to drop below 10°F, add an extra layer of straw or leaves around the base and pile snow against the trunk if available—snow is a natural insulator.
Remove protective layers gradually in early spring as new growth appears. Sudden warmth can shock dormant buds, so wait until daytime temps stay above 40°F consistently before fully uncovering the tree.
Tips & tricks for protecting fruit trees in winter
Here's what nobody tells you about winterizing fruit trees—these tricks make all the difference between survival and disappointment.
Material Selection Matters: When wrapping your trunk in Step 1, avoid plastic wrap—it traps moisture and can cause rot. I've seen tree guards made from burlap or even old towels work perfectly. For extra insulation in snowy areas, that second layer of cardboard around the base is a game-changer—it blocks cold air from the soil while letting moisture escape. Think of it like putting on long underwear under your winter coat.
Windbreak Placement: In Step 2, focus your 3-foot-high windbreak on the north and west sides only. These directions get the worst winter winds. I've seen trees with windbreaks on all sides actually trap cold air against the trunk. And if you're using straw bales, make sure they're dry—wet straw loses its insulating properties fast. Pro tip: Pile snow against the windbreak for even better protection.
Bundle Branches Strategically: When tying branches together in Step 3, don't make the bundles too tight. You want to reduce surface area but not restrict airflow completely. I've used old pantyhose for years—it's soft, breathable, and won't damage the bark. For trees under 10 feet, that burlap drape should be loose enough to allow some circulation, but tight enough to slow heat loss.
Spring Removal Timing: The most common mistake I see is removing winter protection too early. Wait until daytime temps stay consistently above 40°F before fully uncovering your trees. I've watched buds shock and die when trees were exposed to sudden warmth. Remove layers gradually over several days to give your tree time to adjust. Think of it like helping a hibernating animal wake up slowly.
Pro Tips for Fruit Tree Winter Protection
- Here's what nobody tells you about winterizing fruit trees—these tricks make all the difference between survival and ...
- Material Selection Matters: When wrapping your trunk in Step 1, avoid plastic wrap—it traps moisture and can cause ro...
- Windbreak Placement: In Step 2, focus your 3-foot-high windbreak on the north and west sides only. These directions g...
Frequently asked questions
Got questions about keeping your fruit trees cozy through winter? You’re not alone! Here are some of the most common concerns—and straightforward answers—to help you prep like a pro.
When is the best time to start protecting fruit trees from winter?
Start before the first hard frost hits your zone (usually late fall, like October–November in most regions). Young trees or tender varieties (e.g., peaches, citrus) need protection earlier, while hardy trees (like apples or pears) can wait until temperatures dip below 20°F (-7°C). Monitor your local frost dates to time it just right!
Do I need to wrap the trunk, or is covering the whole tree enough?
Both! Wrapping the trunk with tree wrap or burlap prevents sun scald and rodent damage. For full coverage, use frost cloth or burlap sacks over the canopy, securing them loosely to allow airflow. Focus on young trees or delicate species—mature trees often handle winter better with just trunk protection.
What if I missed the window—can I still protect my tree late in winter?
Don’t panic! Late protection is better than none. Use emergency blankets or straw mulch around the base and wrap the trunk with bubble wrap or foam. While it won’t be as effective, it’s still worth it—just add extra layers if a deep freeze is forecasted. Pro tip: Avoid plastic directly on the trunk (it can cause rot).
Are there low-cost or DIY alternatives to commercial winter covers?
Try these budget-friendly swaps:
- Burlap or old blankets (secure with twine or clothespins).
- Pine boughs or straw piled around the base (3–4 inches deep).
- Cardboard boxes (cut to size, filled with leaves, and placed over the canopy).
- Snow—if you get a heavy snowfall, let it blanket the tree naturally!
How do I keep pests (like rodents or rabbits) away from my protected tree?
Pests love winter snacks too! Prevent them with:
- Wrapping trunks with metal tree guards or hardware cloth (bury it 6 inches deep).
- Applying pet-safe rodent repellent (like peppermint oil-soaked cotton balls) near the base.
- Using chicken wire around the trunk if rabbits are a problem.
Wrapping up and next steps
Protecting your fruit trees through winter isn’t just about survival—it’s about setting the stage for a bountiful harvest next season. 🌱 By layering insulation, choosing the right materials, and timing your efforts wisely, you’re giving your trees the best chance to thrive in even the coldest climates.
Now that you’re armed with the know-how, roll up your sleeves and get started—your future orchard will thank you!
Ready to take action? Start with one tree this year and expand as you gain confidence. Happy planting!