
Container Gardens
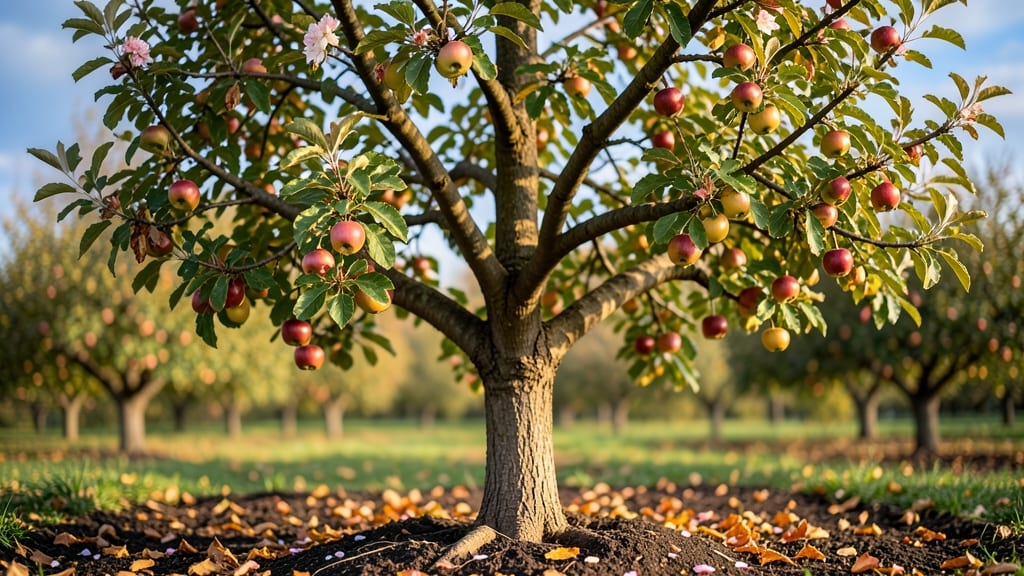
Watching an apple tree growing time lapse—from a tiny seedling to a fruit-bearing giant—is the ultimate gardening triumph. 🌱 The first year reveals every secret of its life cycle—from the fragile sprout breaking through soil to the first blush of pink blooms—if you know what to look for.
Spring brings the real magic: tender new leaves unfurl while roots spread underground. Summer tests your patience as the tree focuses on growth over fruit, and fall rewards you with the first hints of blossoms for next year.
Each season transforms the tree, and the time-lapse effect makes it feel like watching nature's own movie.
You'll learn to spot the warning signs—wilting leaves, stunted growth, or weak branches—and how to adjust care to keep it thriving. The payoff comes when you see those first apples forming, knowing every stage was worth the wait.
Perfect for gardeners who love long-term projects and the satisfaction of nurturing something that will feed you for decades. Let's break down each milestone so you can document your tree's journey too.
📚 In This Guide
- What you need
- Instructions
- Tips and common mistakes
- Wrapping up and next steps
What you need
- ● Apple tree sapling: Choose a dwarf variety (e.g., 'Columnar,' 'Semi-Dwarf,' or 'Columnar') for container growing. Look for a 1-2 year old tree with a sturdy root system.
- ● Container: A 15-25 gallon pot with drainage holes (minimum 18" deep and 24" wide for dwarf varieties). Materials: fabric grow bags, plastic, or ceramic.
- ● High-quality potting mix: 10-15 gallons of a well-draining blend (e.g., 50% potting soil, 30% compost, 20% perlite or sand). Avoid garden soil!
- ● Slow-release fertilizer: Granular or pelletized (e.g., 10-10-10 or 14-14-14 NPK ratio). Use 1-2 cups per season, split into 3 applications.
- ● Organic mulch: 2-3 inches of wood chips, straw, or shredded bark to retain moisture and regulate temperature.
- ● Drip irrigation or watering can: 1-2 gallons capacity for deep watering (aim for 1-2 inches per week during growing season).
- ● Pruning tools: Bypass pruners (for 1/4" to 3/4" branches)
- ● Loppers (for thicker branches)
- ● Sharp pruning saw (if needed)
- ● Support stake or trellis: 4-6 ft tall (e.g., bamboo stake or metal cage) to stabilize young trees.
- ● pH testing kit: To monitor soil pH (ideal range: 6.0-7.0 for apple trees).
- ● Mycorrhizal fungi: A powder or granules to boost root health (mix into soil at planting).
- ● Fruit tree spray: Organic options like neem oil or copper fungicide to prevent pests/diseases.
- ● Grow lights: If indoors or in low-light areas, use LED grow lights (12-16 hrs/day) during winter.
- ● Thermometer/hygrometer: To track temperature and humidity for optimal growing conditions.
- ● Container saucer or tray: To catch excess water and prevent root rot.
How to track your apple tree’s growth through every season
Watch your young tree transform from bare branches to fruit-bearing beauty—here’s what to expect each month.
🌱 Step 1: Early Spring – Bud Break and First Leaves
When temperatures rise above 40°F in late winter, you’ll notice swollen buds along the branches. These are your tree’s promise of growth—each one holds a cluster of tiny leaves and flowers. Within 2-3 weeks, those buds burst open, revealing bright green cotyledons (the first true leaves). Don’t prune yet; wait until after leaves fully unfurl to avoid removing next year’s fruit buds.
This is the moment your tree wakes up. Water deeply once buds swell—10 gallons for a young tree—to encourage strong root development. Mulch around the base with 2-3 inches of organic matter to retain moisture and protect roots from temperature swings. You’ll know you’re on track when leaves appear uniformly along branches, not just clustered at the tips.
☀️ Step 2: Late Spring – Flowering and Fruit Set
By May, your tree will burst into pink or white blossoms—a spectacular but temporary display. These flowers need 60-70°F days and 50°F nights to pollinate successfully. If frost threatens, cover young trees with frost cloth; blossoms are delicate and won’t recover. After flowering, tiny fruitlets (pea-sized apples) form. Thin them to 6 inches apart when they’re the size of a marble—this ensures larger, healthier fruit.
Here’s where patience pays off. Overwatering now causes blossom end rot or splits in developing fruit. Water at the base only, keeping the soil evenly moist but not soggy. You’ll see success when fruitlets stay firm and green, not mushy or cracking. This stage sets the stage for next year’s harvest—so don’t skip the thinning!
🌿 Step 3: Summer – Rapid Growth and Fruit Development
From June through August, your tree enters its growth spurt. Leaves expand to full size, and fruit swells rapidly—doubling in size over 8-10 weeks. This is when you’ll notice new shoots along branches, signaling vigorous health. Prune these suckers (shoots growing from the base or trunk) immediately to redirect energy to fruit production. Also remove any crossing branches that rub together; they’ll create wounds where disease enters.
Summer care is about balance. Water deeply once a week (or more in drought) to encourage deep roots. A 2-inch layer of mulch keeps soil cool and moist. Watch for apple maggot flies—tiny white flies that lay eggs in fruit. Cover young trees with fine netting if you spot them. You’ll know your tree is thriving when leaves stay dark green and fruit changes from green to its mature color (red, yellow, or blush).
🍎 Step 4: Fall – Harvest and Preparation for Dormancy
Harvest time varies by variety, but most apples ripen between September and October. Test readiness by gently twisting the fruit—it should separate cleanly from the stem. Color isn’t the only clue: a ripe apple will have a sweet aroma near the stem and a slight give when pressed. Don’t wait too long; overripe fruit falls and rots on the ground, inviting pests.
After harvest, it’s time to prep for winter. Rake up fallen leaves and fruit (compost them far from the tree to prevent pests). Apply a balanced fertilizer (10-10-10) in early fall to build next year’s buds. If your tree is young, wrap the trunk with tree guard to protect against rodents. You’ll see signs of dormancy when leaves turn yellow and drop—this is your tree’s way of saying, “I’m ready for rest.”
⏰ Step 5: Winter – Dormancy and Root Development
From November through February, your tree appears dormant, but roots are actively growing. Avoid pruning now—wait until late winter when buds begin to swell. Instead, focus on soil health. Top-dress with 2-3 inches of compost to replenish nutrients. If you live in a cold climate, protect young trees with burlap wraps to shield against harsh winds. Snow is actually beneficial—it insulates roots and provides moisture.
This is the quietest stage, but don’t ignore it. Check for mice or voles gnawing at the trunk; wrap the base with hardware cloth if needed. Prune only dead or broken branches—never healthy wood. You’ll know winter care is working when buds swell evenly in spring, signaling a strong, healthy tree ready for another year of growth.
Tips & tricks for perfect apple tree growth tracking
Real talk: Watching your apple tree transform through the seasons is rewarding, but avoiding common pitfalls makes all the difference.
Temperature Matters: The 40°F threshold for bud break is critical—if temperatures dip below this for more than a few days, buds may stay dormant. I’ve seen trees where buds swell but then freeze and turn brown. Monitor your local forecast and be ready to cover young trees with frost cloth if cold snaps threaten. In Step 1, when you notice buds swelling, keep an eye on nighttime temperatures—50°F nights during flowering (Step 2) are just as important as daytime warmth.
Visual Cues for Healthy Growth: In Step 3, when fruit doubles in size over 8-10 weeks, don’t just rely on color—check for firmness. Healthy fruit should feel solid when gently squeezed, not mushy. I learned this the hard way after ignoring slightly soft fruit that later split open. Also, watch for apple maggot flies—if you spot tiny white flies near your tree, act fast by covering it with fine netting. These pests can ruin your harvest before you even notice.
Pruning Precision: The instructions mention pruning suckers and crossing branches in Step 3, but timing is everything. I’ve made the mistake of pruning too late in summer, which stresses the tree when it’s already working hard to develop fruit. Always prune in late winter (just before buds swell) or immediately after harvest in fall. Use clean, sharp tools to make cuts at a 45-degree angle just above a bud or branch collar—this promotes faster healing.
Seasonal Soil Care: In Step 5, when focusing on winter root development, don’t overlook soil texture. Roots need oxygen to grow, so avoid compacting soil around the base. I’ve seen trees with poor growth because mulch was piled too high (more than 2-3 inches) or too close to the trunk. Keep mulch 2 inches deep and 2 inches away from the trunk to prevent rot. In early spring (Step 1), gently fluff the mulch to improve airflow and moisture retention.
Pro Tips for Apple Tree Growing Time Lapse
- Real talk: Watching your apple tree transform through the seasons is rewarding, but avoiding common pitfalls makes al...
- Temperature Matters: The 40°F threshold for bud break is critical—if temperatures dip below this for more than a few ...
- Visual Cues for Healthy Growth: In Step 3, when fruit doubles in size over 8-10 weeks, don’t just rely on color—check...
Frequently asked questions
Got questions about capturing or growing your own apple tree time lapse? Here are some of the most common ones—plus straightforward answers to help you plan, troubleshoot, and succeed!
How long does it take for an apple tree to grow from a seed to fruit?
If you’re starting from seed, expect at least 5–10 years before your tree bears fruit! Grafted trees (common in nurseries) can produce apples in 3–5 years. Patience is key—apple trees grow slowly, especially in their early years. For faster results, opt for a young sapling or grafted tree!
What’s the best time of year to plant an apple tree for optimal growth?
The ideal time is late fall or early spring (before buds swell). Planting in fall gives roots time to establish before winter, while spring planting lets the tree focus on growth without competing with summer heat. Avoid planting in extreme temperatures—root damage can set you back months!
How often should I take photos for a time-lapse of an apple tree?
For a smooth time-lapse, shoot every 3–7 days during active growth (spring/summer) and every 2–4 weeks in dormancy (fall/winter). Use a fixed angle and lighting for consistency. Pro tip: Set up a timer or use an intervalometer on your camera to automate the process!
Can I grow an apple tree in a container, and how does it affect growth speed?
Yes! Dwarf varieties (like ‘Columnar’ or ‘Semi-Dwarf’) thrive in containers (5–15 gallons, depending on size). Container-grown trees may grow 10–30% slower than in-ground trees due to root restrictions, but they’re easier to monitor and relocate. Just ensure well-draining soil and regular pruning to encourage bushier growth.
What should I do if my apple tree isn’t growing or looks unhealthy?
First, check for pests (aphids, borers), disease (fire blight, powdery mildew), or poor soil. Yellow leaves? It might need more nitrogen or better drainage. Brown spots? Fungal issues—prune affected branches and apply copper fungicide. If growth stalls, test your soil’s pH (ideal: 6.0–7.0) and amend as needed. Slow growth can also signal root-bound conditions—repot if in a container!
Will my apple tree produce edible fruit if grown from a store-bought apple seed?
Probably not! Most store-bought apples are hybrids and won’t reproduce true-to-type from seed. You’ll likely get a wild crabapple—small, tart, and inedible for most. For edible fruit, buy a grafted tree from a nursery or propagate from a known variety’s cutting.
Wrapping up and next steps
Watching an apple tree grow from a tiny sapling to a fruit-bearing beauty is a rewarding journey filled with patience, care, and the joy of nature’s progress. 🌱 Each season brings new milestones—whether it’s the first buds in spring, the vibrant leaves of summer, or the promise of harvest in fall—reminding us that great things take time.
Now that you’ve seen the apple tree growing time lapse unfold, why not take the next step?
Ready to plant your own? Start small—choose a healthy sapling, prepare your container or garden bed, and embrace the process. Your future orchard begins with a single seed (or sapling)! 🍏🌿