
Pruning
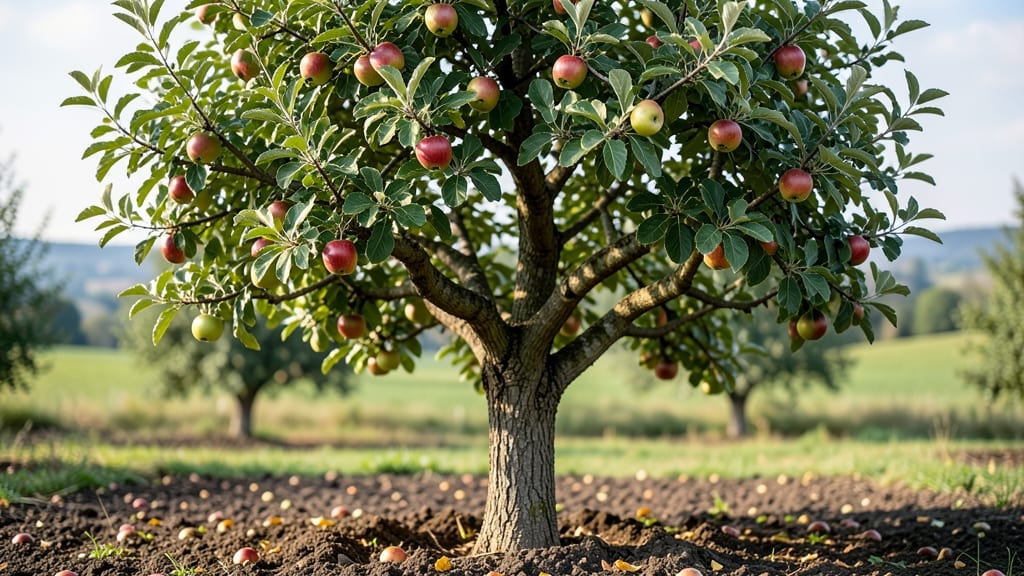
Watching an apple tree time lapse unfold—from a delicate sapling to a towering fruit-laden giant—is like witnessing nature’s slowest, most rewarding masterpiece. 🌱 The first year unfolds in quiet green bursts—leaves unfurling, roots stretching—but by year three, you'll see buds forming, a promise of what's to come.
This isn't just growth; it's a seasonal dance between pruning, sunlight, and patience that transforms bare branches into a canopy heavy with fruit.
The real magic happens in those in-between moments: the first pink blossoms in spring, the way new shoots reach for the sky after winter's dormancy, and how a single fruit swells from the size of a marble to a juicy harvest.
Each stage demands different care—watering deeply when roots are shallow, thinning fruit to improve size, and protecting blossoms from late frosts—but the payoff is worth every season of waiting.
You'll end up with a tree that doesn't just produce apples but tells a story through its rings and branches. The time-lapse reveals patterns you'd miss in daily visits: how quickly leaves emerge after pruning, when buds first appear, or how fruit colors shift from green to red.
It's a visual reminder that good things—like perfect apples—take time.
Perfect for gardeners who love documenting progress or simply want to understand the lifecycle of their fruit tree. The same principles apply whether you're growing a dwarf variety in a backyard or a standard tree in an orchard. Here's how to follow along with your own journey.
📚 In This Guide
- What you need
- Instructions
- Tips and common mistakes
- Wrapping up and next steps
What you need
- ● DSLR or Mirrorless Camera: A minimum of 12 MP (e.g., Canon EOS Rebel T7, Sony Alpha A6000). For 4K time-lapse, a 1080p or higher model is ideal.
- ● Tripod: Sturdy, adjustable-height (59–79" recommended) with a quick-release plate for easy setup.
- ● Intervalometer: Built-in or external (e.g., Vello ShutterBoss) to set 1–5 minute intervals (adjust based on growth speed).
- ● Memory Card: 32GB+ (Class 10 or UHS-I for 4K) to store high-res images.
- ● Weatherproof Case: For camera gear (e.g., Pelican 1040) to protect against rain/sun.
- ● Apple Tree: A healthy, young-to-mature tree (3–15 years old) with visible seasonal changes (buds, leaves, fruit).
- ● Stable Shooting Spot: A flat, unobstructed area within 10–20 feet of the tree’s trunk for consistent framing.
- ○ Backup Power: Portable charger (e.g., Anker PowerCore 20100) for long shoots (optional but handy!).
- ● Wide-Angle Lens (10–24mm): Captures the full tree in one frame.
- ● Gimbal or Stabilizer: (e.g., DJI RS 3 Mini) for smooth panning shots if moving the camera.
- ● Weather Station: To track temperature/humidity and correlate growth stages.
- ● Drone (FAA-compliant): For aerial shots (e.g., DJI Mini 2 SE with 2.7K video).
How to document an apple tree's seasonal growth through a time lapse
Capture the magic of an apple tree's yearly journey with this simple, foolproof time-lapse approach.
🌱 Step 1: Choose Your Tree and Set Up Equipment
Select a healthy young apple tree with good light exposure—this is your star. I always pick a tree with a sturdy trunk and visible buds for the best visual progression. Set up your camera or smartphone on a tripod at least 10 feet away to capture the entire canopy.
Position the camera at a 45-degree angle to include both the lower branches and upper growth. Use a wide-angle lens if possible—apple trees fill the frame beautifully. I like to place a small, inconspicuous marker (like a painted rock) near the base to help track subtle changes over time.
☀️ Step 2: Schedule Seasonal Shoot Intervals
Start in late winter when buds first swell, then capture images every 2-3 weeks through spring and summer. I use my phone's timer function to take 5-10 shots in quick succession—this helps avoid motion blur from wind or wildlife. The key is consistency: shoot at the same time each session (morning light is best).
Mark your calendar for these critical dates: bud break (March-April), first leaves (April-May), flowering (May), fruit set (June), and harvest (September-October). These milestones create natural story points in your time lapse. Don't skip any sessions—missing even one interval breaks the progression.
⏰ Step 3: Edit and Compile the Time Lapse
Transfer your photos to a computer and use free software like Windows Photo Gallery or iMovie to create the sequence. I always start with the winter bud stage and end with harvest apples. Set the transition speed to 1-2 seconds per image—this creates a satisfying flow without feeling rushed.
Add soft background music (nature sounds work beautifully) and include text overlays for key dates. Here's the thing—your audience won't know what they're seeing is a year's growth unless you tell them. I like to add captions like "Bud Break - March 15" and "Harvest Ready - October 5" to make the transformation clear.
🌿 Step 4: Final Touches and Sharing
Export your time lapse as an MP4 file and test it on different devices to ensure smooth playback. I always create two versions: one with text captions for clarity and one without for artistic effect. The captioned version is great for educational purposes while the clean version works better for aesthetic sharing.
Share your time lapse on social media with a hashtag like #AppleTreeJourney. Real talk: people love watching nature's transformations unfold. Include a brief caption explaining the timeline—something like "One year of growth, captured in 60 seconds!" This gives viewers context they wouldn't get from the video alone.
Tips & tricks for perfect apple tree time lapse
Took me a while to figure these out, so here goes—these tricks will help you capture the most stunning seasonal transformation of your apple tree.
Camera Angle Matters: When positioning your camera at that 45-degree angle in Step 1, make sure the horizon line is level. I learned this the hard way after realizing my first attempt had a slight tilt that made the tree look like it was leaning. Use a spirit level app on your phone to check alignment—this subtle detail makes a huge difference in the final composition.
Lighting Consistency is Key: In Step 2, when scheduling your shoots, always photograph during the same time of day. Morning light is ideal because it's soft and even, but if you choose afternoon, stick with that window. I once shot at different times each session and ended up with inconsistent lighting that made the time lapse look choppy. Golden hour (just after sunrise or before sunset) is perfect if you can work with it.
Weather Backup Plan: For Step 2's 2-3 week intervals, I now keep a backup date scheduled for each session. Apple trees can be unpredictable—rain, wind, or sudden storms can ruin a shoot. If you miss a session, the progression will look unnatural. I keep my backup dates just 2-3 days after the original to minimize gaps while still capturing the natural timeline.
Pro Tips for Apple Tree Time Lapse
- Took me a while to figure these out, so here goes—these tricks will help you capture the most stunning seasonal trans...
- Camera Angle Matters: When positioning your camera at that 45-degree angle in Step 1, make sure the horizon line is l...
- Lighting Consistency is Key: In Step 2, when scheduling your shoots, always photograph during the same time of day. M...
Frequently asked questions
about apple tree time-lapse growth—because every gardener deserves clarity! Whether you're planning your first orchard or refining your pruning skills, these answers will help you track progress like a pro.How long does it take for an apple tree to produce fruit after planting?
Most apple trees take 3–5 years to bear fruit after planting, depending on the variety and growing conditions. Dwarf trees may fruit sooner (2–3 years), while standard trees can take up to 7 years. Patience is key—focus on proper pruning and care during the early years to speed up maturity!
What’s the best time of year to capture a time-lapse of an apple tree?
For a full seasonal transformation, start filming in late winter/early spring (when buds swell) and continue through fall harvest. Key milestones to highlight: bud break (March–April), blossoming (May), fruit set (June), and harvest (September–October). Use a waterproof camera if filming after rain!
What equipment do I need for a high-quality apple tree time-lapse?
A basic setup includes:
- A DSLR or smartphone with a time-lapse function (or a dedicated intervalometer).
- A tripod or stable surface to avoid shaky footage.
- An external hard drive (time-lapses generate gigabytes of data!).
- Optional: A weatherproof case for outdoor protection.
Why did my apple tree’s buds fail to bloom this spring?
Bud failure can stem from cold damage (late frosts), disease (fire blight), poor nutrition, or pruning at the wrong time. Check for:
- Blackened or mushy buds (fungal infection).
- No new growth after buds swell (likely frost or drought).
- Thinning foliage (nutrient deficiency—fertilize in early spring!).
Can I use a time-lapse to monitor my apple tree’s health between seasons?
Time-lapses reveal subtle changes like:
- Leaf color shifts (early signs of disease or pests).
- Branch dieback (indicating stress or borers).
- Fruit drop patterns (overwatering or nutrient issues).
Wrapping up and next steps
Watching an apple tree transform from bud to harvest is nothing short of magical—each season brings new life, challenges, and rewards! 🌳🍏 Whether you’re a seasoned gardener or a curious beginner, this time-lapse journey reminds us that patience and care pay off in the sweetest way.
Now that you’re armed with the right knowledge, why not plant your own tree or document its growth with your own time-lapse project?
Start small: mark the first bloom, track the fruit’s progress, and celebrate every milestone. Your future harvest—and the joy of nurturing life—will be worth every moment!